Conform
Smart Rendering
8 minute read
Exporting = Rendering and Encoding
When Premiere is going to export some edited video, it has to do two separate tasks: rendering and encoding. It’s important that you understand what that means, so you can understand why the below method can save you time.
When Premiere exports a video, it starts by reading the source file that you have imported into your project, which is nearly always a compressed file. Then it decompresses the file so that it can deal with the actual image. It’s not saving the uncompressed image to a file – it’s just holding it temporarily in memory.
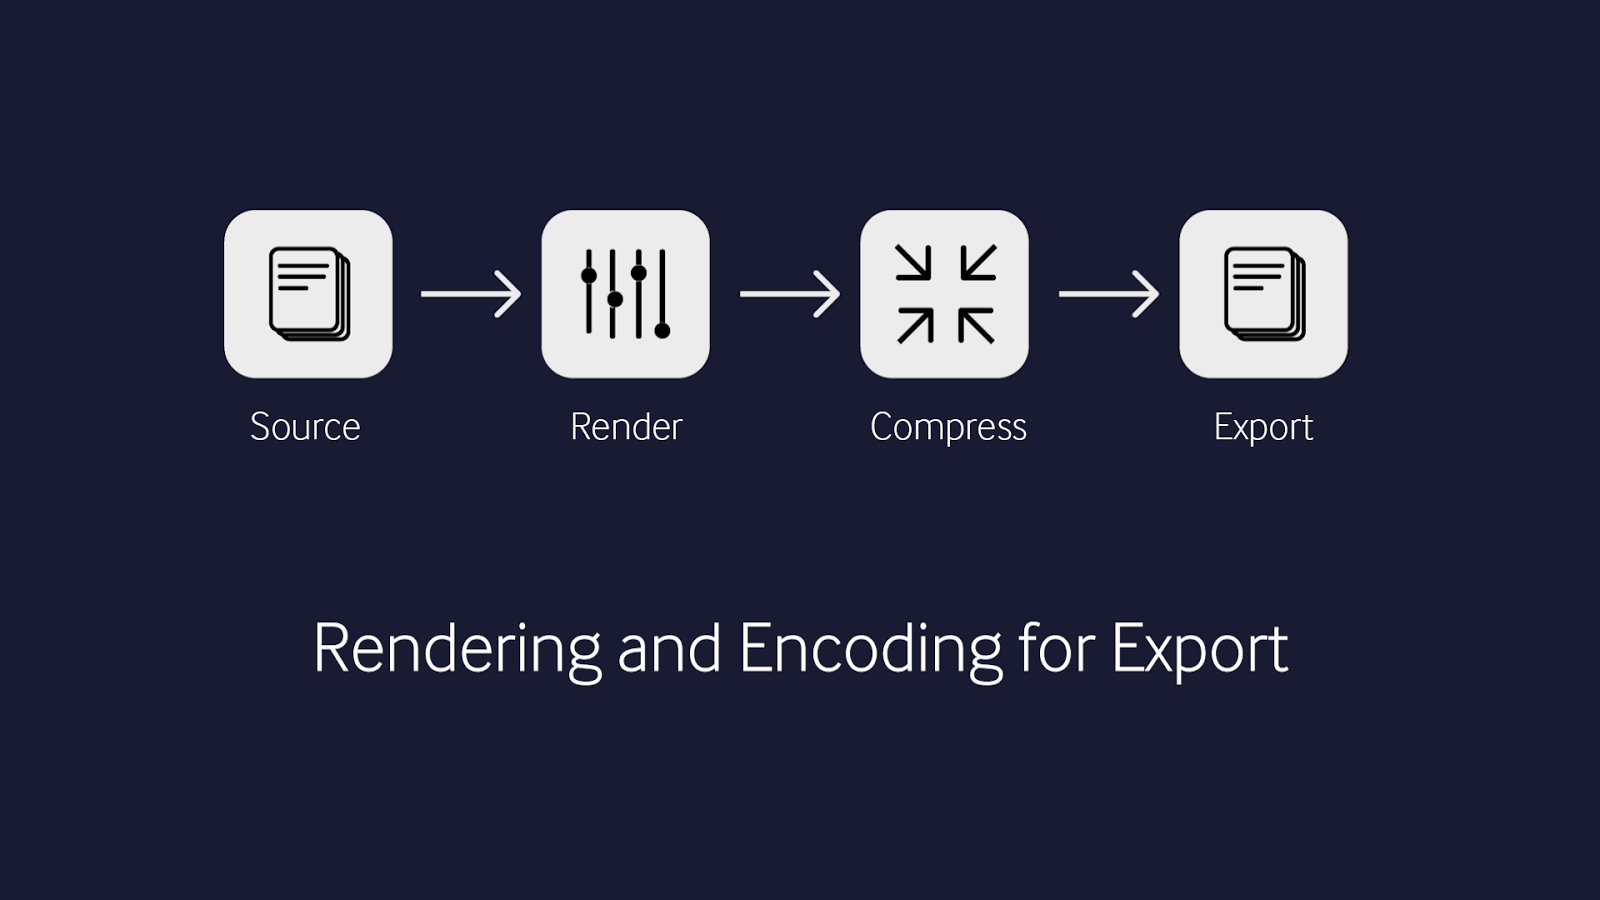
Next it applies any transformations that you’ve done in your sequence – color correction, resizing, any manipulations to the image. That’s rendering.
Then it encodes the image into whatever codec you chose in your export settings, and it saves that compressed data to the output file. So, we start with a compressed file, and we end up with a compressed file.
Now, it’s usually not possible to skip either one of those steps—you usually have to render and then encode when you’re exporting. But our first trick allows you to avoid rendering and encoding multiple times. In most situations, you don’t just render out your timeline once. You often render out a rough cut, and then you get feedback from your producer or your client (perhaps using a tool like Frame.io), and then you need to export again after you have made some tweaks. And then the process repeats itself, so you often end up exporting the same timeline several times. If we’re careful about our rendering and exporting, though, we can save a lot of time.
1. Compress Previews
Imagine you have a clip on your timeline with a bunch of color corrections. If you tell Premiere to export, it’s going to render that file with your color correction, and then it’s going to compress that data into an output codec. If it’s a long clip with a lot of adjustments, it might take about 60 seconds.
But you can also tell Premiere to just render the clip, and save that rendered file on the hard drive. That file is called a preview file, and you can use that file for exporting later without rendering all over again.
To start, click on “sequence” and then “render in to out”. Now Premiere renders that clip and saves it away, and the bar on your timeline turns green.
The green bar means that Premiere does not need to render that section of the timeline again when it exports.
Now if you go to export the clip again, and check the box in the export settings that says “use previews,” now Premiere will simply take the file that it saved when you render and compress that to an output codec. It does not need to render any of the color corrections – it just needs to read that rendered file and encode it (we usually call that a transcode). And that takes only a couple seconds, instead of 60 seconds from before.
Now let’s say that you want to change the title at the end of your film because there was a typo the first time. Premiere will still need to render the changed title, but it doesn’t have to render the main clip again, which means that the second export will be almost as fast as the last one.
If you are only making fairly small changes to your edit, all of your exports from now on will be very quick.
All of that sounds wonderful, but there is a catch. By default, Premiere uses a fairly low-quality codec for its previews. That means that, if you check the box to use previews when you export, the final result will not have the full quality that you’re expecting. That is fine if you are just going to export a low-resolution preview and it’s not the final version, but what if you want to export the full quality clip multiple times?
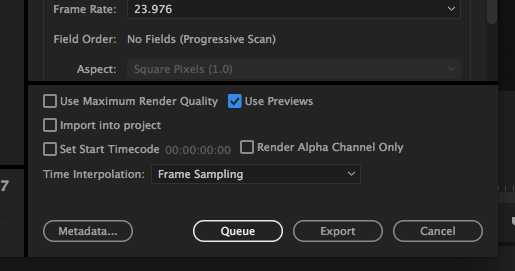
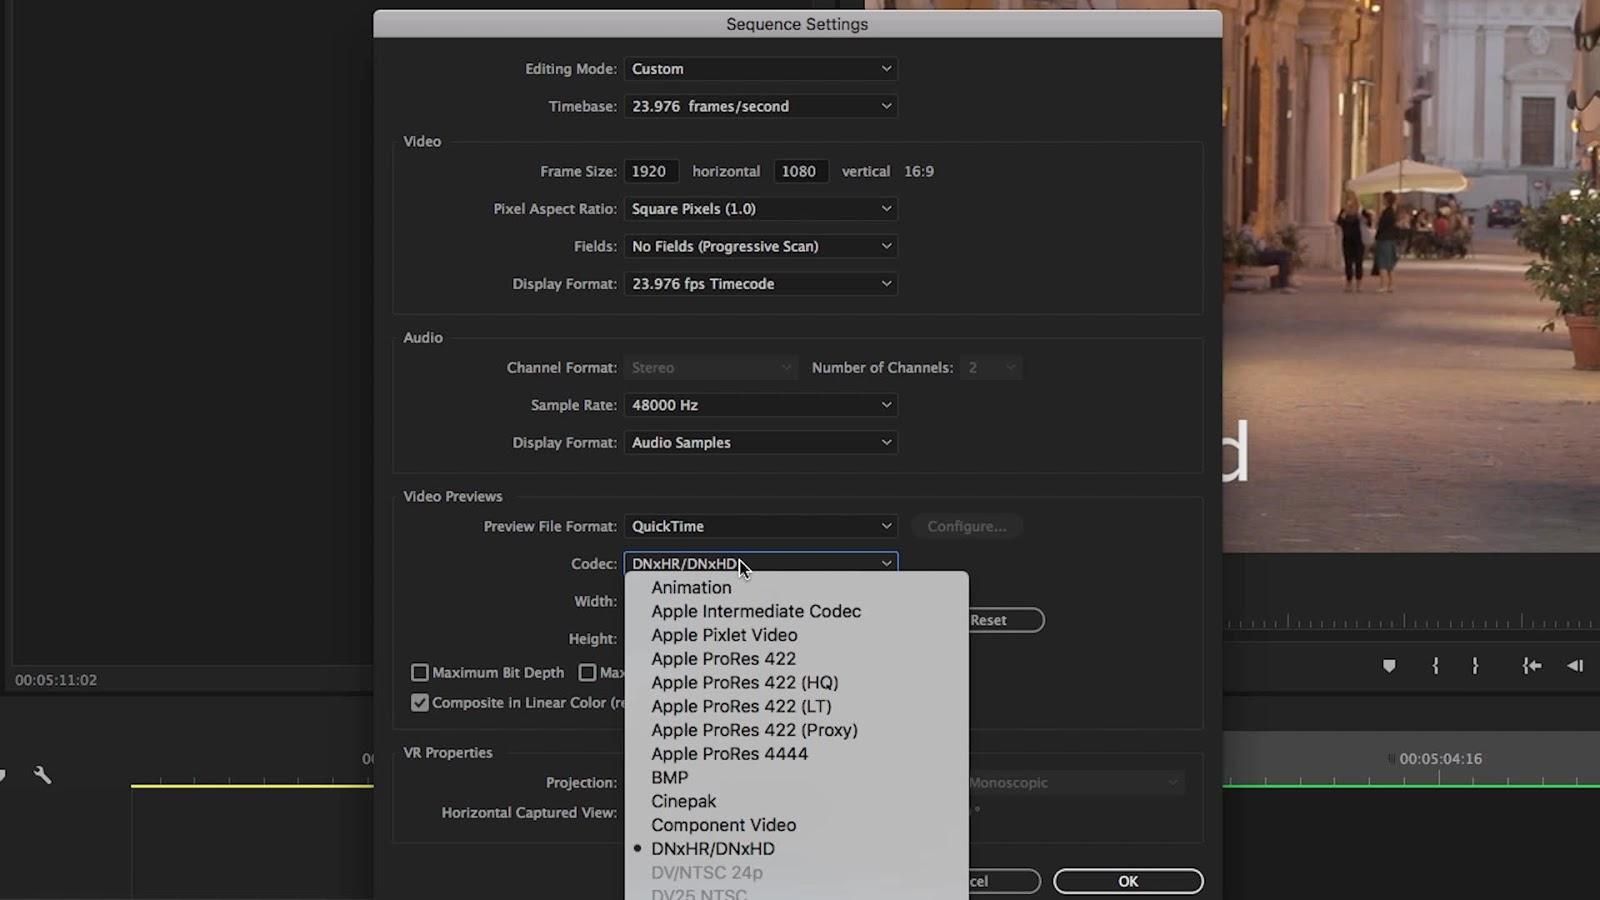
In that case, you need to change the preview codec to a high-quality codec, which is very easy. Go to “Sequence Settings,” then “Preview File Format.” If you want to be absolutely sure that you aren’t losing any quality, then you can choose a lossless or uncompressed format. Bear in mind that, if you use a very high-quality, high-bitrate codec for your previews, that may take up a lot of space on your hard drive, so most people will pick something on the high end but not the very top (maybe ProRes 422 HQ).
2. Smart Render From Previews
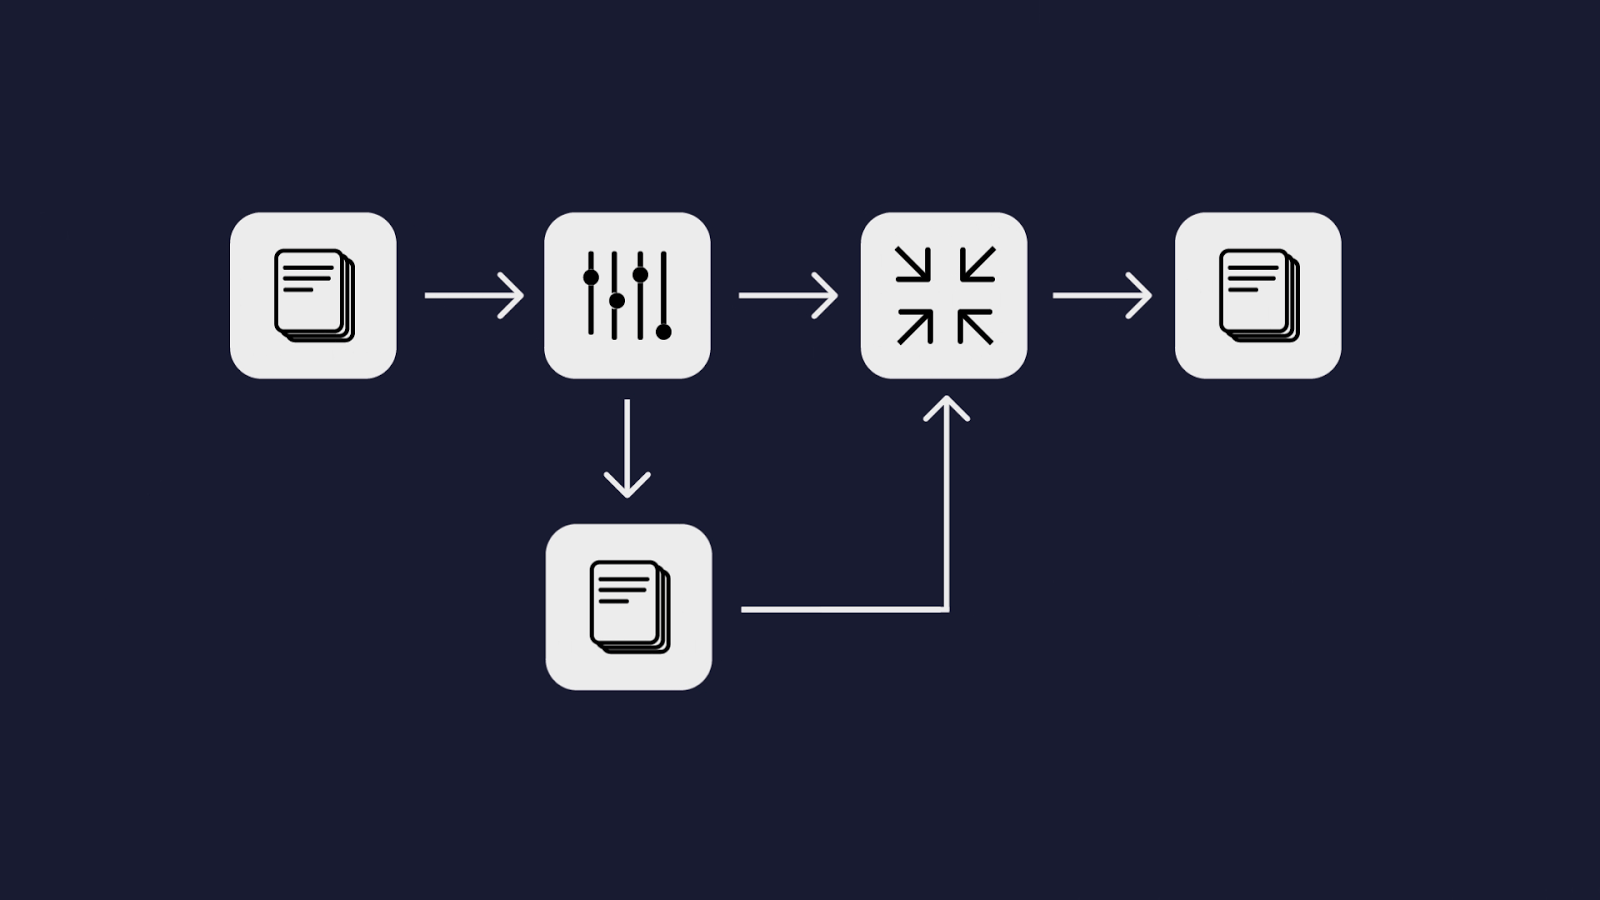
There’s one more feature of the “use previews” box that can make a huge difference in render times, and strangely, it’s seldom mentioned. If you choose exactly the same codec settings for preview files and for your output file, you can skip both the rendering and encoding when you export.
Because Premiere has already rendered the previews and encoded them, all it has to do is copy the data into the output file. Premiere calls this Smart Rendering, and in this case we are actually combining the Use Previews feature and the Smart Rendering feature.

Check out the video for a detailed walkthrough.
That clip, which took about 60 seconds to export normally, and took about 5 seconds with the normal “Use Previews”, takes less than a second when you Smart Render from previews.
This trick has the extra advantage that the image is not processed twice. If you use previews without the Smart Render, then your image will be compressed twice (unless you choose an uncompressed codec as your preview codec, of course).
This trick doesn’t work for all codecs unfortunately—you have to use one of the codecs listed under “QuickTime Match Source (Rewrap) Support”. The two most common codecs listed are ProRes and Cineform, both of which are great.
The tricky part is knowing whether or not Premiere is using your preview files exactly as they are and just copying them into the export file, or whether Premiere is reading those preview files, decoding them, and then re-encoding them into the output file. It’s important for you to know, because if it’s re-encoding those files, then you could be losing some quality, because the images are being compressed twice. And of course it will take longer, which is lame.
Fortunately, it’s not actually that hard to do. Select a clip, pre-render it, and then export with the Use Previews box checked, and write down how long it takes. Then export again, but make a small tweak to your output codec. You should use the same codec, but make a small change (maybe go from ProRes 422 to ProRes 422 HQ). You should see the slightly tweaked export taking longer, because now it’s having to transcode your preview files, whereas the first time it just copied the data. If it takes about the same amount of time to do both exports, that probably means that Premiere is not using the Smart Render feature.
Test Results Showing Smart Render Working:Preview files set to ProRes 422 HQ, Exported to ProRes 422 HQ: 1.4 seconds.Preview files set to ProRes 422 HQ, Exported to ProRes 422: 5.6 seconds.
Test Results Showing Smart Render Not Working:Preview files set to ProRes 422 HQ, Exported to ProRes 422 HQ: 4.9 seconds.Preview files set to ProRes 422 HQ, Exported to ProRes 422: 5.6 seconds.
3. Smart Render from Source
The third trick can make a HUGE difference in export speeds, but it will only work for people who are doing only the editing in Premiere, not the color correction.
Let’s imagine that you are the editor for a film, and the camera department has given you proxy files to edit with. They took the raw files from the camera and converted them into a DNxHD proxy format with a standard Rec. 709 look (which means you don’t need to add a LUT to the timeline in order to preview accurately). You are just doing the edit, so you don’t need to bother with any color correction or special effects in premiere.
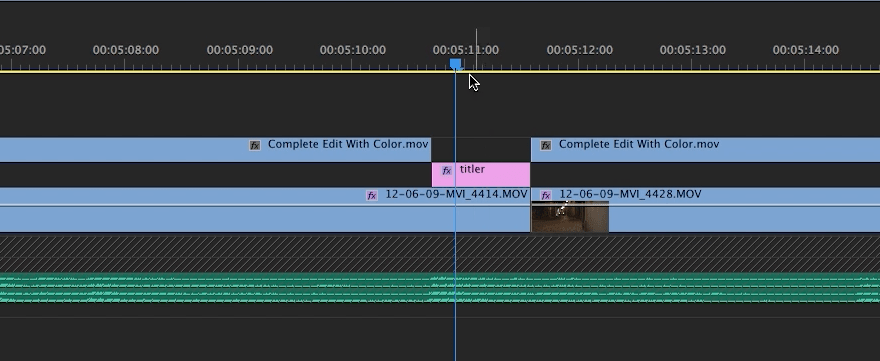
{caption: The grey “fx” boxes show that you have not applied any effects or color correction to these clips.}
If you export in exactly the same format as the source footage, which in this case is DNxHD, then Premiere doesn’t have to render or compress at all. You haven’t added any color correction or effects to the clips, so Premiere can copy the images straight from the original files, which are DNxHD, and paste them into your exported file, which is also DNxHD.
This is another way to take advantage of Premiere’s Smart Rendering feature, but this time we’re only using the Smart Rendering, not the Use Previews feature. When you’re Smart Rendering from your source footage, you can export an entire 10-minute film in a few seconds. It’s that fast.
Again, since we’re using the Smart Render feature, we can only use one of the codecs listed on this page. H.264 files, for instance, will not work with this workflow, but ProRes, DNxHD, and Cineform all work well.
4. Smart Render from Export
Trick #4 is a lot more flexible than the first three. There are no restrictions about your source footage, you don’t need to pre-render the timeline before you export, and it works even if you’re doing lots of effects and color correction in Premiere.
The first time that you export, you have to wait for the normal export. But if you need to make a minor change to the edit and export again, you do a smart render from your first export.
You take the first export and import it back into your project, and then lay it on top of your timeline in a new layer. Then you take the slice tool and cut away whatever portion of the timeline that’s been changed for the second export.
As long as you use the same settings for both exports, Premiere will be able to copy the compressed data straight from your exported file into your second exported file. All that it has to render is what’s changed, and so it exports extremely quickly.
The great thing about this method is that you don’t have to prepare anything first. You didn’t have to remember to pre-render your sequence. You can take advantage of this trick after the fact.
Again, this works with ProRes, DNxHD, Cineform, and all of the codecs listed on this page.
Note, in each of these 4 tricks, we care about saving time on the rendering and compression of the video not the audio. Audio is so easy to process compared to video that it’s not worth bothering about. You’ll notice in the image above that the audio channels are locked, and only the video portion of the export has been added back onto the timeline. The audio was not.
Continue readingfor free
Unlock all 100,000 words of the Frame.io Workflow Guide and learn how the pros do workflow.
