Edit
DaVinci Resolve Proxy Workflow
5 minute read
It’s no secret that Resolve requires some powerful hardware. Whereas other NLEs can comfortably run on laptops, Resolve has a legacy of big iron deployments. Before da Vinci Systems went bankrupt and had its assets sold off to Blackmagic Design, Resolve only existed as a turnkey solution, with vendors supplying specific hardware and software. Their hardware was quite powerful for its time, and Resolve ran on specially tweaked distributions of Linux.
Blackmagic Design released DaVinci Resolve to the masses by porting the software to Mac and Windows, and allowed users to install it onto their own hardware. This was hugely liberating—whereas color correction had been a kind of secretive dark art hidden away in color suites costing hundreds of thousands of dollars, the hardware and software associated with legitimate color correction dropped by an order of magnitude. Soon, a proper color correction suite could realistically be built for less than $50,000.
Much has been written about how Resolve is perhaps turning into the one single most powerful tool in post-production. After Fairlight was incorporated into 14, Patrick Inhofer wrote about how Resolve actually has a shot at turning into the long elusive “Studio” software: one integrated app wherein different post-production specialties would all be able to collaborate within the same, integrated software: dailies, offline editing, color grading, audio mixing, and online editing. The release of 15 brought the Fusion page in, and with it, VFX artists.
So Resolve is poised to be used far and wide in assorted post-production specialties–but one big hurdle is to make sure that it’s properly tuned for every different kind of collaborator.
Offline editors and audio mixers don’t want or need the hardware to be natively debayering 8K 60-fps RED WEAPON footage. It would be a ridiculous waste of resources to buy a high-end finishing workstation hardware just to allow every collaborator to edit from original camera files.
Instead, just as Avid Media Composer, Adobe Premiere Pro, and Apple Final Cut Pro X all have ways of internally generating proxy files, so too does DaVinci Resolve.
In DaVinci Resolve, both in the interface as well as the documentation, these kinds of internal proxies are referred to as “optimized media.”
Let’s take a look at some heavy, sample R3D files. It can be quite taxing to debayer and play such files in their native format.

Here in the media page we can perform operations on specific clips that follow those clips around to the other pages, in the Edit, Color, Fusion, Fairlight, and Deliver pages.
Before we go creating optimized media though, we need to make sure we’re putting it into the correct spot.
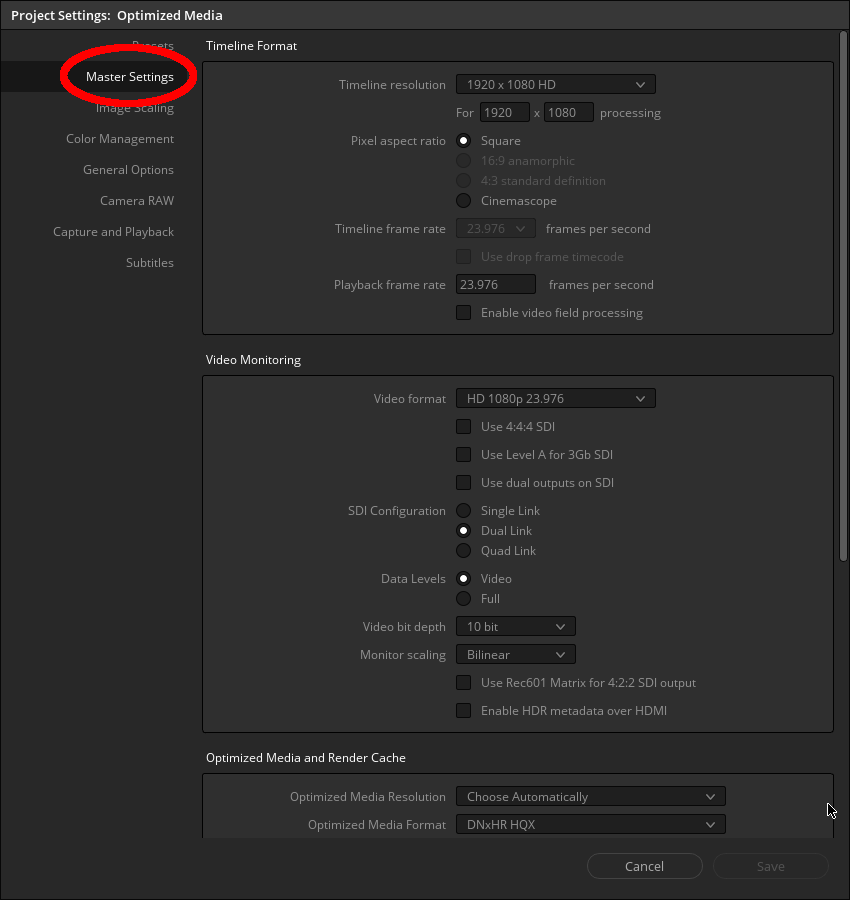
Go into “Project Settings,” either by clicking File > Project Settings or by clicking the sprocket icon in the bottom right of the GUI.

Once in Project Settings, you’ll want to be in the “Master Settings” section on the left.
In this window, scroll down to the “Working Folders” section.
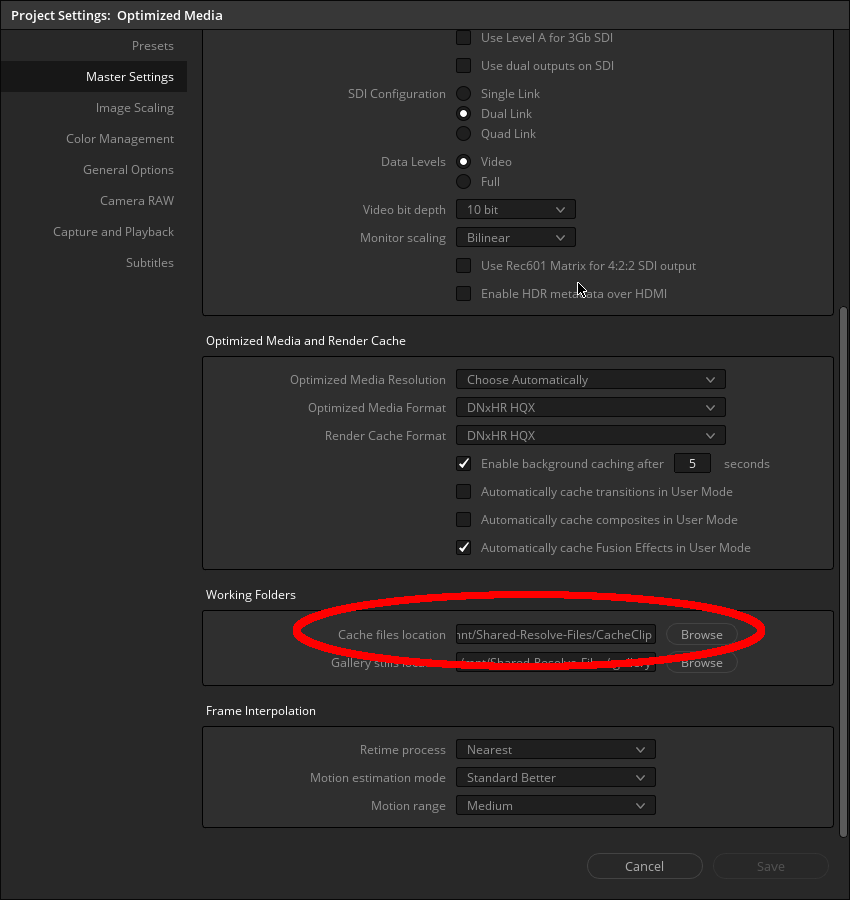
The “Cache files location” is where the optimized media will live. We’ll want to put it on either a proper network share from a NAS or SAN, a connected direct-attached external hard drive or RAID, or even an internal dedicated hard drive or RAID, separate from the boot drive. Wherever you choose, you’ll need good read and write speeds.
Hop back up to the previous section, “Optimized Media and Render Cache.” We’ll need to tweak two settings here, for “Optimized Media Resolution,” and “Optimized Media Format.”
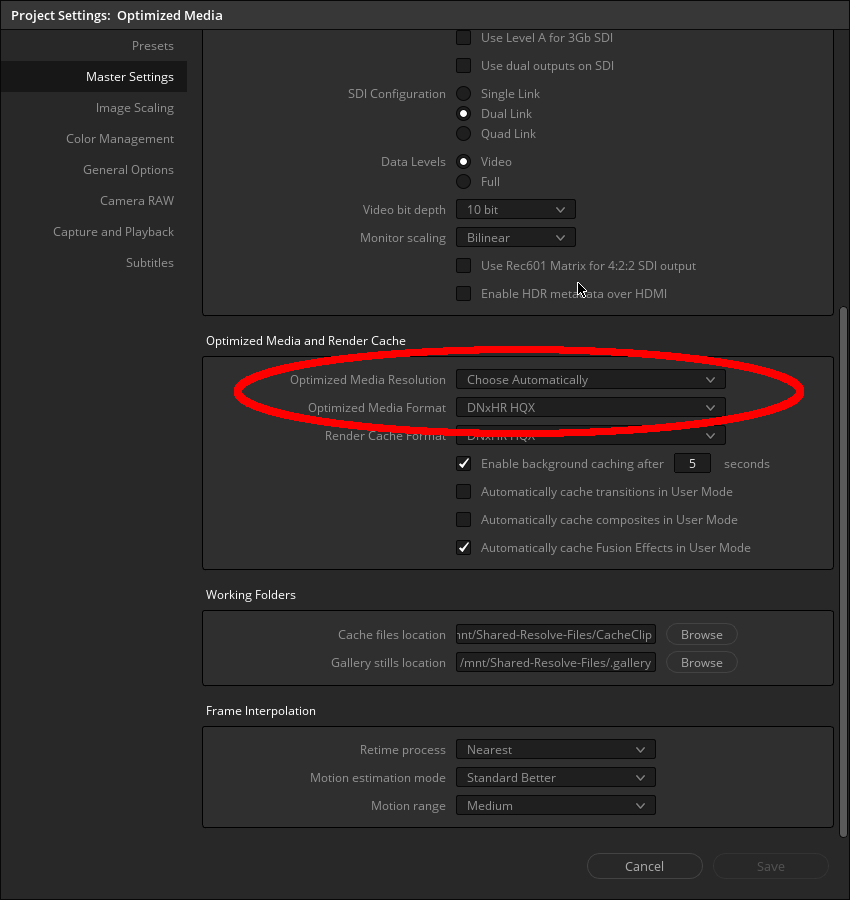
In “Optimized Media Resolution,” you can manually choose what size you want these proxies to be. So if you have UHD (3840 x 2160) footage but want your proxies to be 1080p (1920 x 1080), you’d choose “Half.” The fractions refer to the relative sizes of one dimension like height or width, but “Half” actually provides a quarter of the number of pixels. We’re in two dimensions, so (½)² is equal to ¼ the number of pixels.
“Choose Automatically” is another option. The DaVinci Resolve 15 manual explains:
The “Choose automatically” option of the Resolution setting bears a bit more explanation. When selected, only source media with a higher resolution than the selected Timeline resolution will generate downsized optimized media. How much each clip will be downsized depends on how much larger each clip is than the Timeline resolution. For example, if you’re working within a 1080 resolution project, then 8K clips will generate quarter-resolution optimized media, and 4K clips will generate half-resolution optimized media, such that all optimized media is somewhere around 1080 resolution. All clips that are 1080 and smaller generate optimized media at the same resolution as the source clips.
You have lots of options to choose a format in “Optimized Media Format.” If you’re just cutting the offline edit or mixing audio in the Fairlight page, you might choose DNxHR LB or ProRes 422 Proxy. However, if you intend to use this optimized media in your final color on the Color page or VFX in the Fusion page, you’ll want to choose a high-quality mezzanine format.
Now that we have our settings in place, we can close the Project Settings window and return to the Media Pool.
For which clips do we want to generate optimized media? In the Media Pool, you can either:
- Click on one clip;
- Click on one clip, hold down shift, and click on another clip to select all clips in between, including both clips you selected; or
- Hold down Ctrl [on Windows or Linux] or ⌘ [on Mac] and click on particular clips you want to select.
When you have one or more clips selected, right-click and select “Generate Optimized Media.”

Then you’ll see a window showing you a progress bar.
Unfortunately, in Resolve, this can’t be a background process, like in Final Cut Pro X. So go grab a coffee.

When you return from coffee, you’ll find that, as you add clips into the Edit page, you’ll be using the optimized media. The associated optimized media will be associated with the clip inside Resolve.
Over on the Edit page, select “Playback” in the menu bar and make sure that “Use Optimized Media If Available” is checked. If a particular clip in your sequence has associated optimized media, then that’s what you’ll be playing back.
If you went looking for the optimized media in File Explorer or Finder, you’d find that the optimized media exists in the folder you selected earlier, but it’s not particularly useful outside of DaVinci Resolve. It exists in a proprietary .dvcc image sequence container.

Continue readingfor free
Unlock all 100,000 words of the Frame.io Workflow Guide and learn how the pros do workflow.
