Prep
LUTs and CDLs
7 minute read
Let’s talk a bit about LUTs and CDLs here and explain what they are and where they are being used in production. The main question is when to use one or the other and what the advantages of each one are.
LUTs and how they work
Starting with the most known and used – the LUT, or Lookup Table.
A Lookup Table basically works like a digital camera filter–meaning that it is a primary adjustment. It affects the entire image—a LUT cannot reflect keyers, power windows or any kind of tool that isolates the adjustment to a part of the image.
The effect is similar to just adding a blue piece of glass in front of the camera when shooting: The glass turns the image blue and the effect is definite – meaning that if you want less of the blue effect, there is no way of making the glass “less blue”. It’s similar in your software of choice–it offers you for instance a slider that lets you dial in a blue tint dynamically – however, a LUT you can either load, or no –you cannot load a LUT only half way. If you want to mitigate the effect of the LUT, you need to dial against it with another tool in your software– for instance, load the LUT onto a layer (or node) and dial down that layer’s/node’s opacity.
That however makes it a bit of a double back and forth: Add 50, subtract 10 not an ideal process. Therein lies a big advantage of a CDL, but we’ll get to that in just a bit.
There are usually two kinds of applications for LUTs: One is technical LUTs, where the LUT is supposed to do a technical conversion from one color space to another, without adding any kind of creative look into the image. Such a conversion can be for instance RED Wide Gamut to Rec709.
Another example is the use of calibration LUTs, where the only purpose is to calibrate the corresponding display in order to show reference colors and light levels.
The other application for LUTs is obviously the creative field. There are lots of LUT-packages out there (as anyone can create them easily) which define certain looks – cold, warm, vintage and whatever you want to call them. Creative LUTs can serve as a starting point for a creative grade. Swapping out a LUT against another one is as easy as changing a glass filter in front of a camera lens, hence it is perfectly suited for quickly shuttling through a number of different looks for a given scene.
Another advantage of LUTs is that they can be loaded into a multitude of hardware devices, like Monitors and LUT-boxes, that can process it on the fly without further delay.
Creative LUTs are a good way to transfer the intended look of a given scene from set to post: During the shoot, the live SDI signal from the camera is being routed through a LUT-box, which modifies the live SDI signal on the fly – being controlled by any software that supports the LUT-box–most established is Pomfort’s LiveGrade in this field. The look dialed in for a particular scene can then be saved as a LUT and forwarded to post as a starting point for the final grade. This LUT can also be used to create the offline dailies, that are going to be used in editorial: This way there is already a rough look applied during the edit.
An important thing to understand about using creative LUTs in post is that they don’t free you from actually grading and balancing your clips. Let’s say you have two clips of the same scene – one shot in bright sunny daylight, and when the second one got shot, there was a cloud in front of the sun and the whole image got much darker.
If we now apply the same LUT to both clips, the effect will be the same (let’s go with the blue-ish tint here again)– but still one clip will show darker than the other, so balancing the two, so they match each other, is inevitable.
Another thing to keep in mind is that low-resolution LUTs can indeed cause banding and artifacts in your image, so don’t trust just any free LUT-package out there that comes across.
LUTs exist in two flavors: 1D and 3D
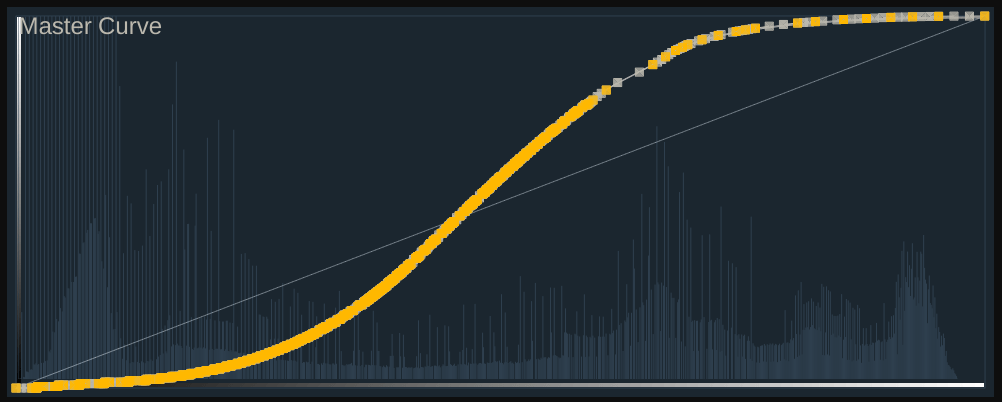
1D LUTs are obviously the simpler ones, since they are basically just a gamma curve (and can easily be converted to one): An input value maps to an output value and that’s about it. 1D LUTs are mainly used for log conversions (e.g. ARRI LogC to 2.4 gamma).
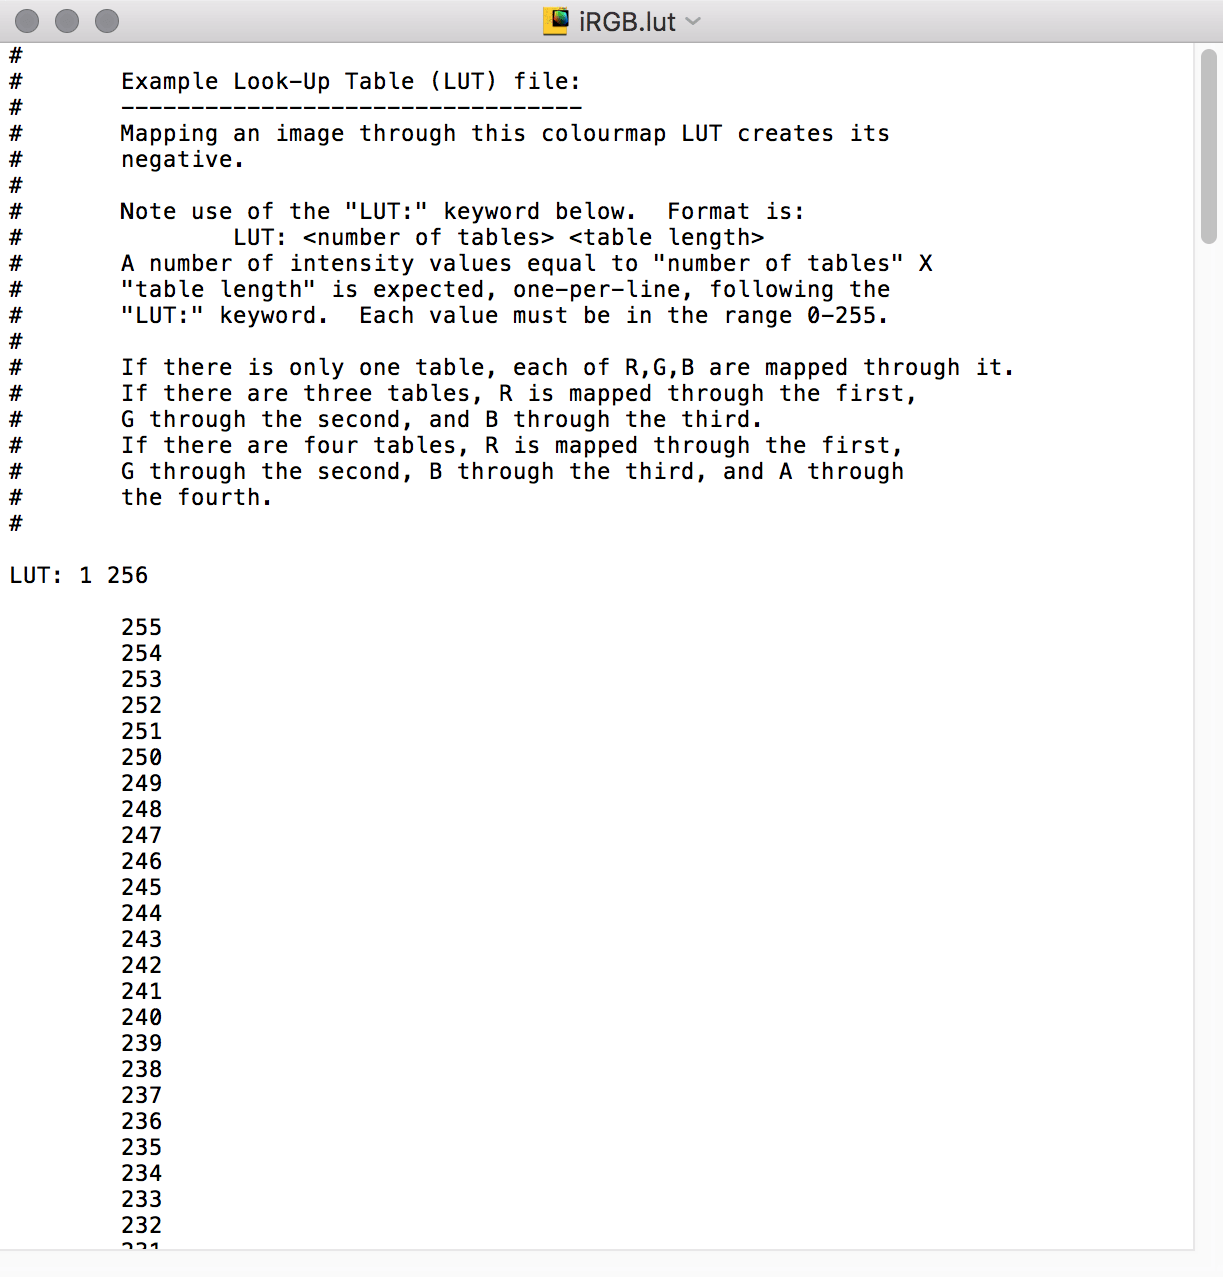
The most common file extension is .lut – sometimes (but rarely) you can also find them in an XML format. The accuracy of a LUT is expressed in two parameters: Size and Depth. Size defines the number of input values that can be mapped – the more values between 0 and 1 (black and white), the more accurate the LUT is.
And Depth is the same accuracy, but on the output side. If you open up a 1D LUT with a text editor, size is basically the number of entries in there, and depth the accuracy of those entries: With a depth of 8 bit you will find values between 0 and 254, whereas with a depth of 10 bit you will find values between 0 and 1023 – a much finer grid.
A 1D LUT can contain just one table that maps R,G and B channels equally, or it can contain 3 tables to map each one and even a fourth channel for alpha (if supported by the software).
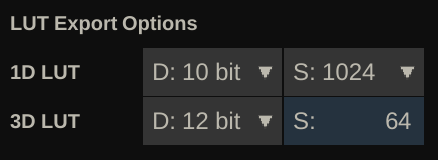
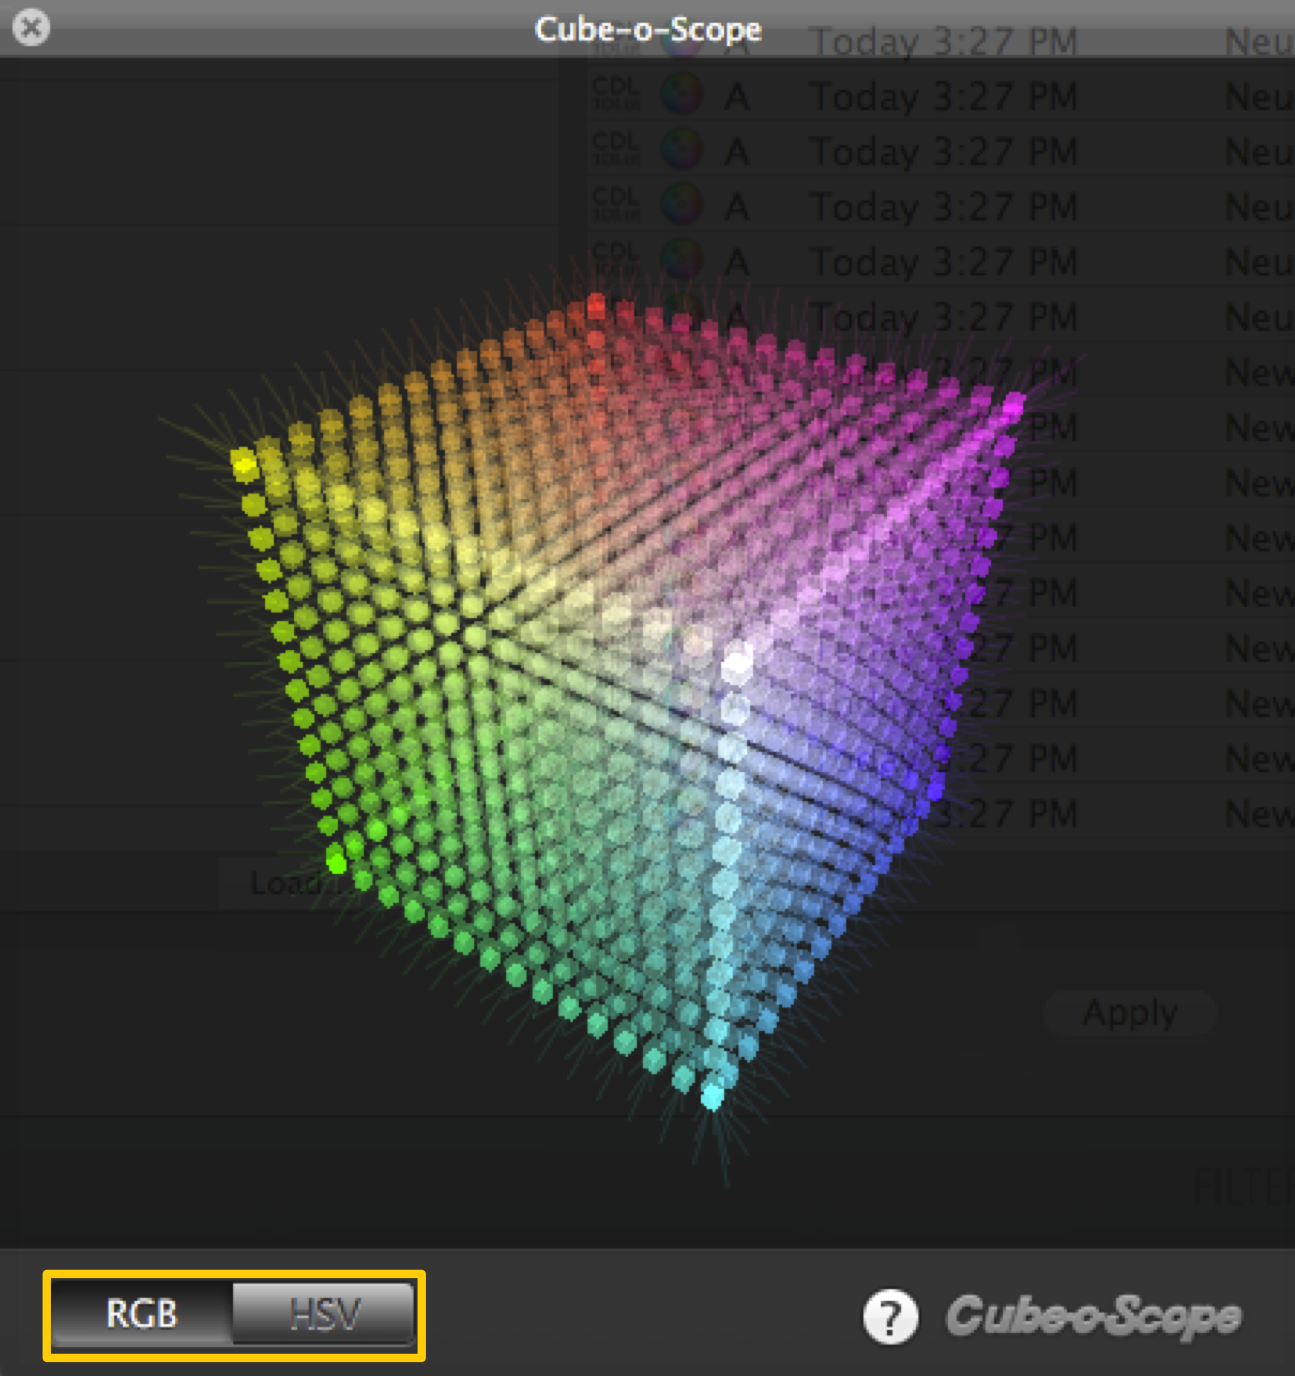
Now for the 3D LUTs – no, it has nothing to do with stereoscopic 3D. Instead, imagine a 3D cube, where hue, saturation and lightness are mapped to each axis: X, Y and Z. The same input/output game that we know from the 1D LUTs plays here in 3D space. Effectively, this means that you can e.g. map a red-color pixel directly towards green, whereas with a 1D LUT you can only increase, or decrease a red value. Same as with a 1D LUT, the accuracy of a 3D LUT is expressed through size (of the cube) and bit depth (of the entries inside).
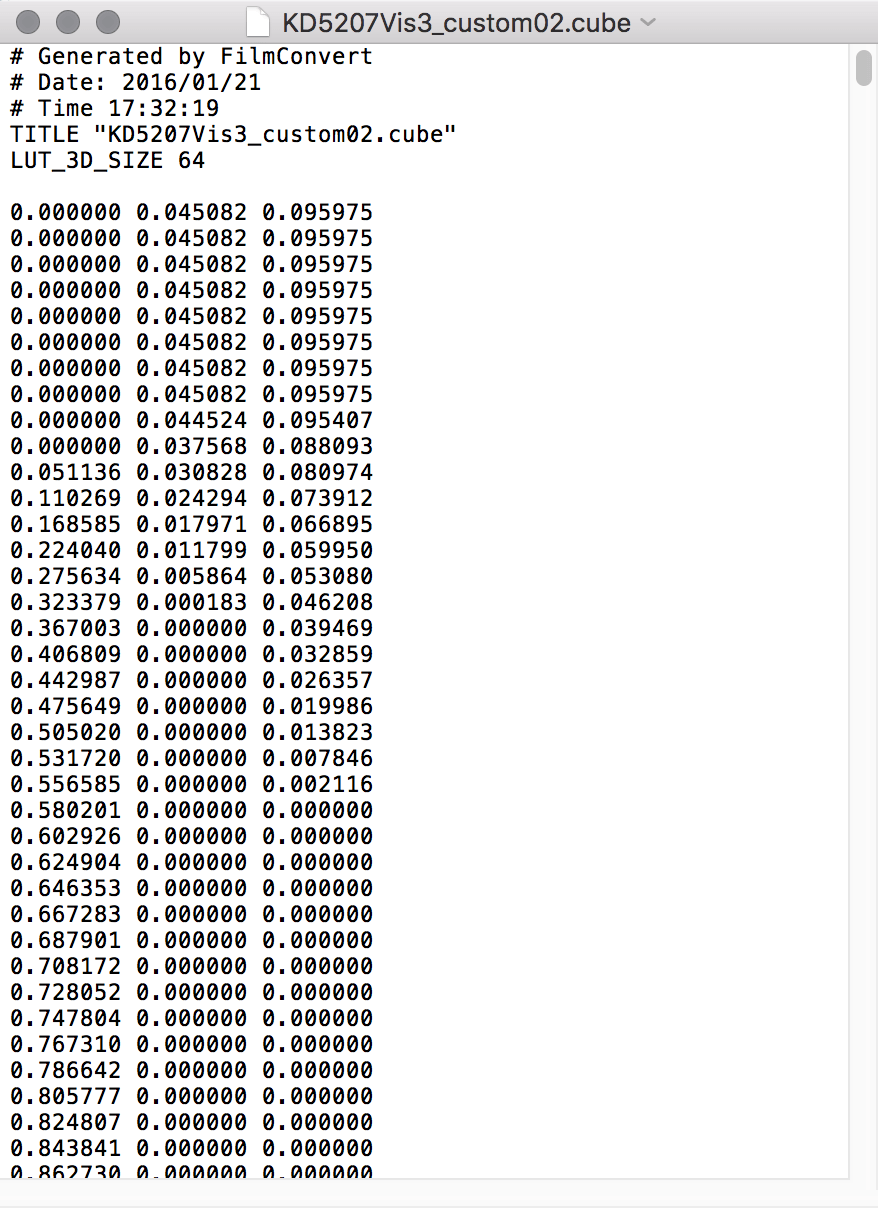
The most common file extensions you will find are .3dl and .cube – but there are more, less common ones out there, too.
An important thing to keep in mind: Not all softwares and hardware boxes support 3D LUTs equally – make sure you have your LUTs in the correct file format, size and depth for the software/hardware you intend to use them with.
CDLs
So there’s this other thing, called “CDL” – Color Decision List.
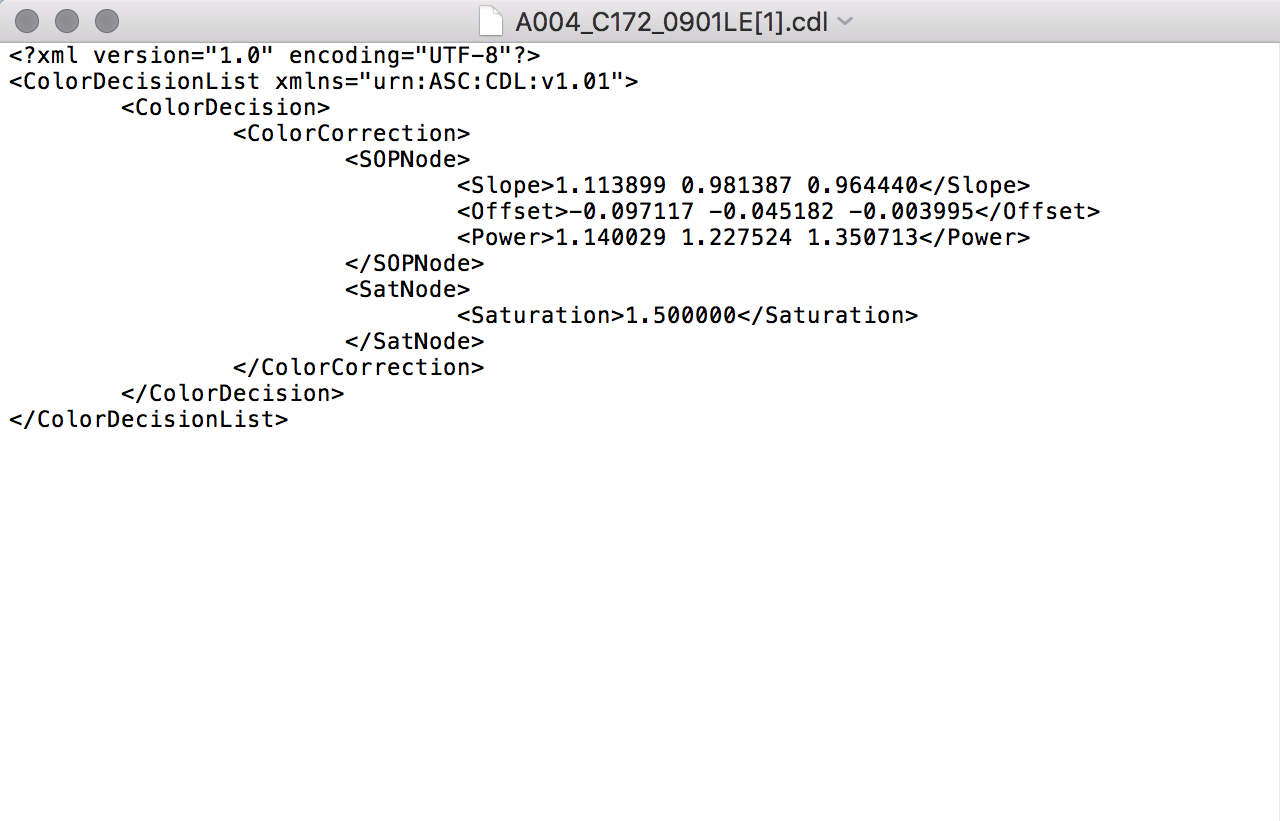
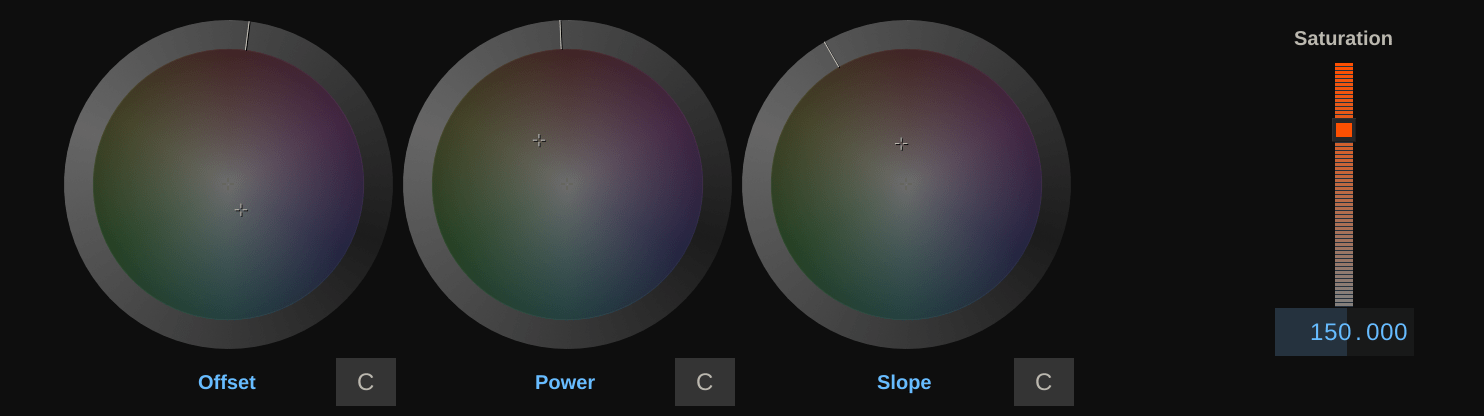
A CDL is a standardized set of four parameters: Offset, Power, Slope and Saturation. That is obviously a very simple and limited toolset, but the upsides are compelling: A CDL is less destructive than a LUT, supported by all major grading- and editing- softwares out there and unlike a LUT, it is adjustable even after it has been applied.
What does that mean practically?
Let’s stick to our on-set example here. During the shoot, the looks for each scene are created using a CDL toolset in our live grading software of choice. All looks are then exported in a CDL format: This can be .cdl, or (mostly used by vfx softwares) .cc. Many softwares also allow to export an ALE (Avid Log Exchange) that contains the CDL values per clip and can be conformed in another software, so all looks can be applied in one go. Also a good old EDL (Edit Decision List) can, in addition to the actual edit, also contain the CDL values per clip. To be complete, there is another alternative for a format that can contain multiple CDLs: The .ccc format, which only contains a number of separate CDLs – this is however rarely used as it’s lacking a lot of metadata, which is often required. Most of the time when receiving a .ccc file, there is actually only one single CDL grade in there anyways.
Now here comes the interesting part: When a CDL gets loaded into a grading software, the CDL uses the built-in CDL tools of our software to achieve the look. This means, if we store a CDL, which increases the saturation from 100 to 150 and load that CDL into our grading software, we will actually see our saturation slider go up to 150. If we decide to dial back the saturation, we can just grab the slider and tweak it down to lets say 120.
The difference to our LUT is this: First of all, the CDL workflow is only one operation in the end: Go from saturation 100 to saturation 120. With a LUT, we’d first add 50 to our saturation, and then set the saturation slider to 70 (subtracting 30 again) in order to have a nominal 120 – that’s two counteracting operations and mathematically more destructive. Second – a LUT has a defined size and bit depth – the bigger both are, the better. However, the tools in nowadays grading softwares all work in floating point, which is much more accurate.
These differences are often not easily noticeable and in many scenarios not even considerable. However, the differences are there.
CDLs are all in all easier to transfer between different softwares and easier to maintain. They are also commonly used for exchange between vfx and editorial/grading/screening.
However, a LUT is the easier thing to apply and also makes sure the look stays defined and is not altered easily. Also, when creating a LUT, you do not have to stick to the CDL-parameters – you are welcome to use Lift, Gamma and Gain, or curves to achieve the look. So there’s also a tad more creative freedom in the way you can create a certain look. This also accounts for technical LUTs, such as in color space conversion, or display calibration – in both of those scenarios, a CDL would prove impractical to use.
I hope this quick overview of LUTs and CDLs gave you enough information to decide for one or the other on your next project and also a few hints on what to look out for when using them.
Continue readingfor free
Unlock all 100,000 words of the Frame.io Workflow Guide and learn how the pros do workflow.
