Conform
Blend Modes
7 minute read
Blend modes are tools for merging two images together.
Learning how to use them can be incredibly valuable for any creative professional, as they are mostly standardized across all video editing and compositing software, including Adobe Premiere, Final Cut Pro X, DaVinci Resolve, and Nuke. They are often underutilized though, as many users think of them as mysterious functions capable of only creating strange visuals. However, understanding what is objectively happening “under the hood” instead of just subjectively observing with your eyes can unlock the full potential of blend modes as powerful utilities in your workflow.
In this subsection we’ll break down five blend modes: Difference, Multiply, Linear Dodge, Subtract, and Darker Color. You will learn what is actually happening in the software when you click on each one and how that knowledge can be applied to solve common problems every editor, visual effects artist, and motion graphic designer is guaranteed to encounter across his or her career.
What is a Blend Mode?
Blend modes composite two images together using a mathematical equation or algorithm that an A and B value passes through to define a new output.
Some of the less-used ones can become fairly complicated to those of us without computer science degrees, but a vast majority of blend modes are relatively simple to digest.
The “A” value is the active layer, the image you apply the blend mode to. The “B” value is the background image, the one you are blending with. Now what inputs into the A and B values?
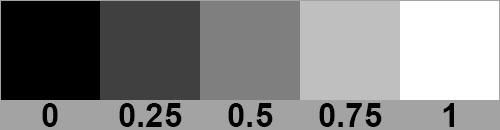
Blend modes can access different color information, but for the purposes of the below examples, assume only the luminance value (brightness) is being used. Luminance values are typically represented ranging from 0 – 255. These numbers may look familiar to those working with Level Adjust tool in Photoshop.

When inputting into a blend mode however, these numbers are converted to a range from 0 to 1. “0” is pure black, “0.5” is middle gray and “1” is pure white. You do not need to know the exact number you are working with, as long as you understand relatively where within this range your value falls.
Now that we have the basic framework understood, let’s get into some examples of how this could be used.
Image Comparison with Blend Modes
Everyone has been in a situation where you need to know if two images are exactly the same (and if not, what is different about them). The aptly titled blend mode Difference can help you here.
The exact equation of the Difference blend mode varies slightly per software, but its essence is simple: each pixel in image A is subtracted from the corresponding pixel in image B. If the result is a negative number, it is converted into a positive number, so it actually doesn’t matter whether you subtract A from B, or B from A.
If the two pixels in A and B are very similar, A – B will result in a very small number. The smaller the number, the closer to black it is, so areas in the image that are very similar appear as very dark, whereas areas of high difference are brighter.
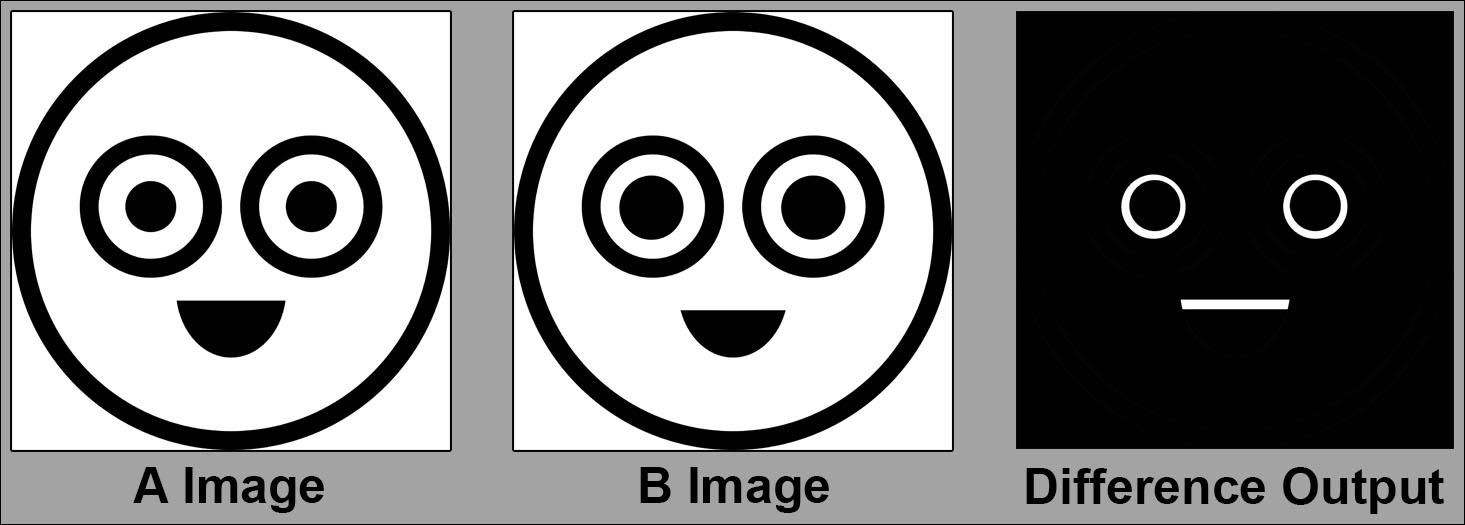
For the purposes of simplicity, this example uses pure black (0) and pure white (1) in the image above. You can see that the identical pixels in the A and B images output black, while the pixels that are different output white. Those white parts in the blended image can then be used to identify the change in pupil size and mouth shape as the differences between the A and B images.
Here is a real-world example. The lion is yawning, while the shot remains still, so the background is very dark, while the lion’s face, which has moved between to two images, appears brighter.

Let’s outline a few practical examples in which this would be helpful:
- When working with animation or visual effects, it’s common to receive multiple versions of the same shot. Use the Difference blend mode to compare two versions and see exactly what has changed
- When resizing an image to match the positioning of a reference, using the Difference blend mode saves you a lot of guesswork. With the media you are scaling as input A and the reference image as input B, you can easily find the point at which your images align.
- When answering the age-old question, “Are these two mislabeled files the same thing?” Simply line up the start points, turn on the Difference blend mode, and scrub through your timeline. If the two video files start to vary from one another, your program monitor will begin to output some very discolored images.
We can’t stress enough how many varied functions the Difference blend mode can be used for. Recreate the scenarios mentioned above to start getting familiar with the function. Then keep this in the back of your head and you’ll be amazed at how many times the Difference blend mode can speed up your workflow or give you absolute confidence in assessing any multitude of situations.
Creating Masks with Blend Modes
Anyone working with graphics elements has run into this issue—a file delivered without an alpha channel. If the file is on a solid white or black background, a blend mode can save you the imperfect results of keying, the tedium of manually masking, or the agony of waiting for a graphic designer to return your call.

Various blend modes can be helpful in this situation, so let’s consider the following examples:
Multiply: A x B. The white pixels of the active layer disappear to reveal the background layer. The black pixels remain unchanged.
Linear Dodge (Add): A + B. Often thought of as the opposite of Multiply, the black pixels of the active layer disappear to reveal the background layer. The white pixels remain unchanged.
Subtract: B – A. The white pixels of the active layer turn black and the black pixels of the active layer disappear to reveal the background layer.
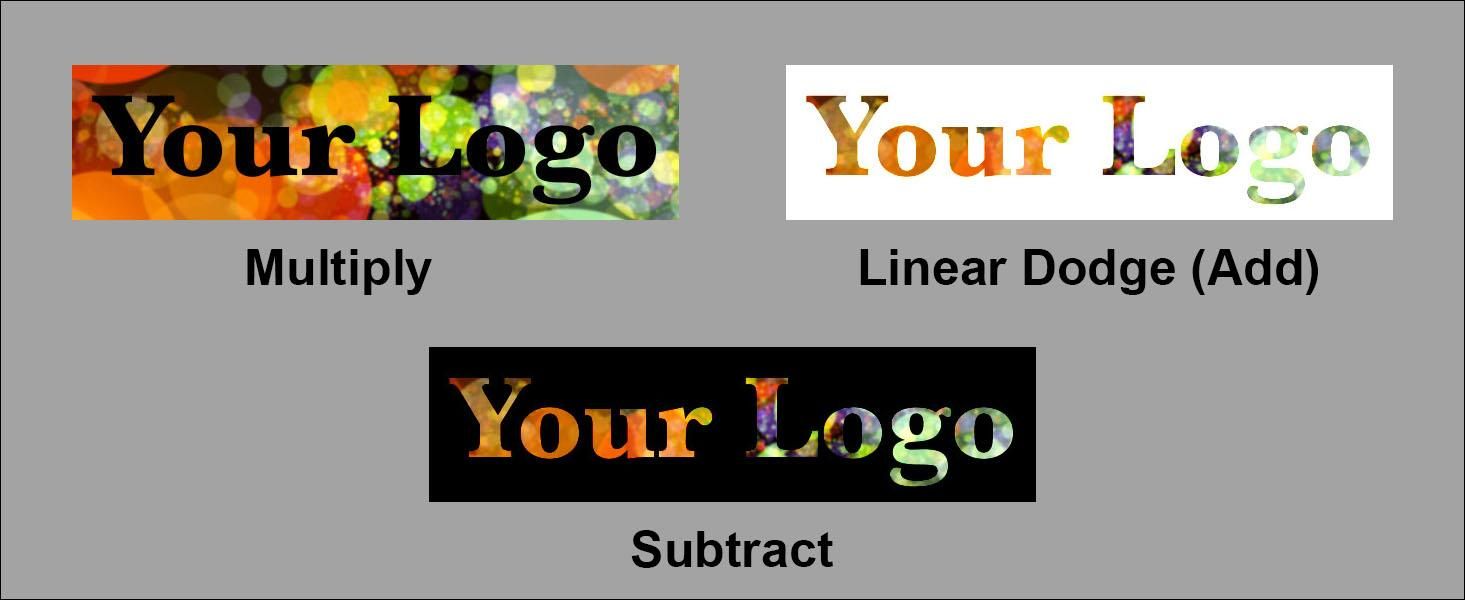
Applying what we’ve learned above regarding black and white inputting as 0 and 1 respectively, it is not hard to see why we get these results. In the example of Multiply, any number multiplied by 0 (black) becomes 0 and any number multiplied by 1 (white) remains the same. In the example of Linear Dodge, any value added to 1 continues to be white, as 1 is the highest value in our range. Adding 0 (black) displays the background image, as adding 0 to any value produces no change.
As with the Difference blend mode, the deeper your understanding, the more uses you will find. For example, practical muzzle flare and fire effects are often filmed in all black environments. Using the Linear Dodge to composite them easily removes the background while leaving the middle color ranges to interact with the background layer. As you experiment with these concepts, try the Screen blend mode as well. The equation, 1−(1−A)×(1−B), can seem a little scary to those of us with film degrees, but if you are working with solid black and white images, the results mirror Linear Dodge. Once you start adding other colors into the mix, you will start to see a difference in how those colors interact.
Sky Replacements with Blend Modes
Picture this: The sun is setting behind the beautiful Los Angeles skyline. Tall buildings extend into the clouds. Nubbly palm tree silhouettes adorn the mountains extending as far as the eye can see. Now picture this: You are sitting in a dimly lit room staring at an iMac wondering how you are going to replace the sky without having to rotoscope every little palm frond. Don’t worry, blend modes are here to help.
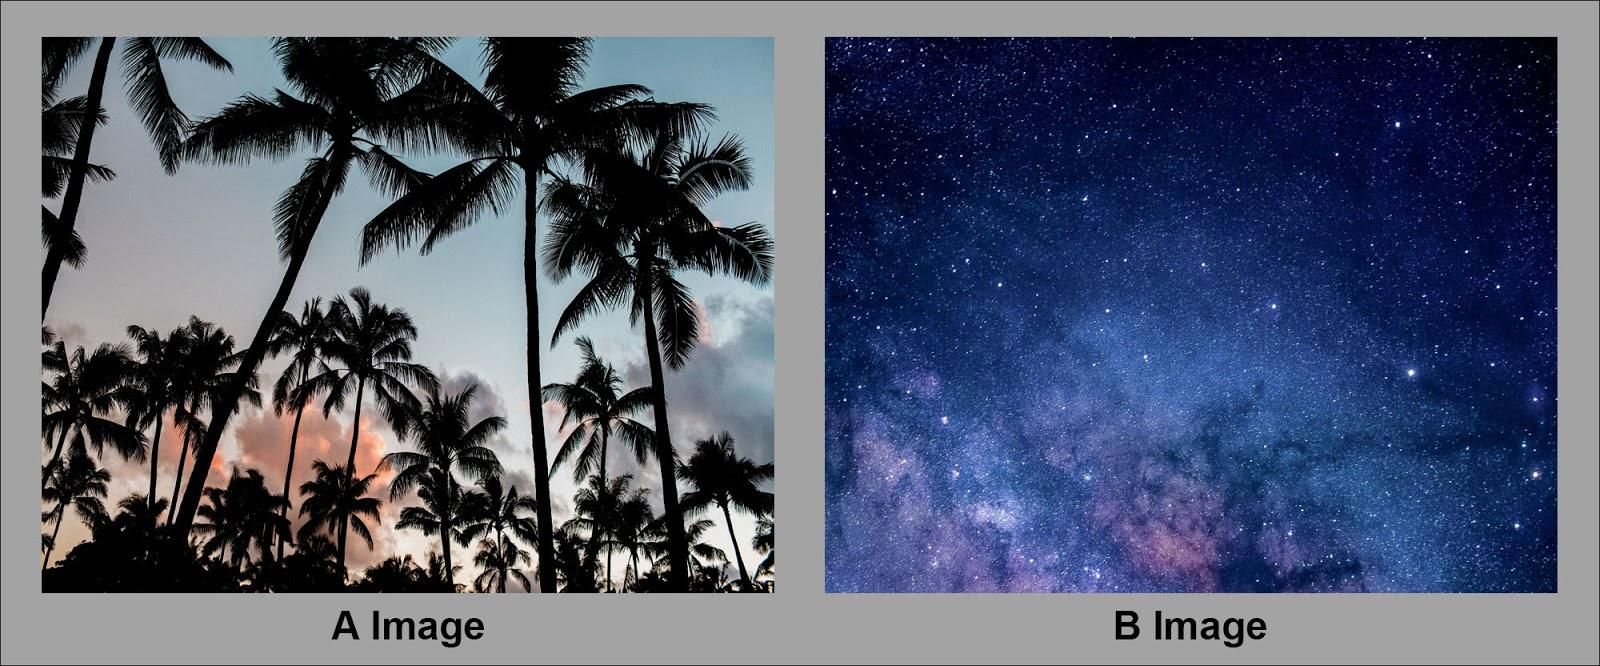
Darker Color: Under the hood, this blend mode is a simple algorithm that looks something like this: if (A < B), display A. If (A > B) display B. Or simply put, Darker Color compares each pixel in your active and background images, then displays whichever one is darker. This mode is slightly different than others mentioned in this article, as it does not create a new value, but chooses which of the existing values to display.
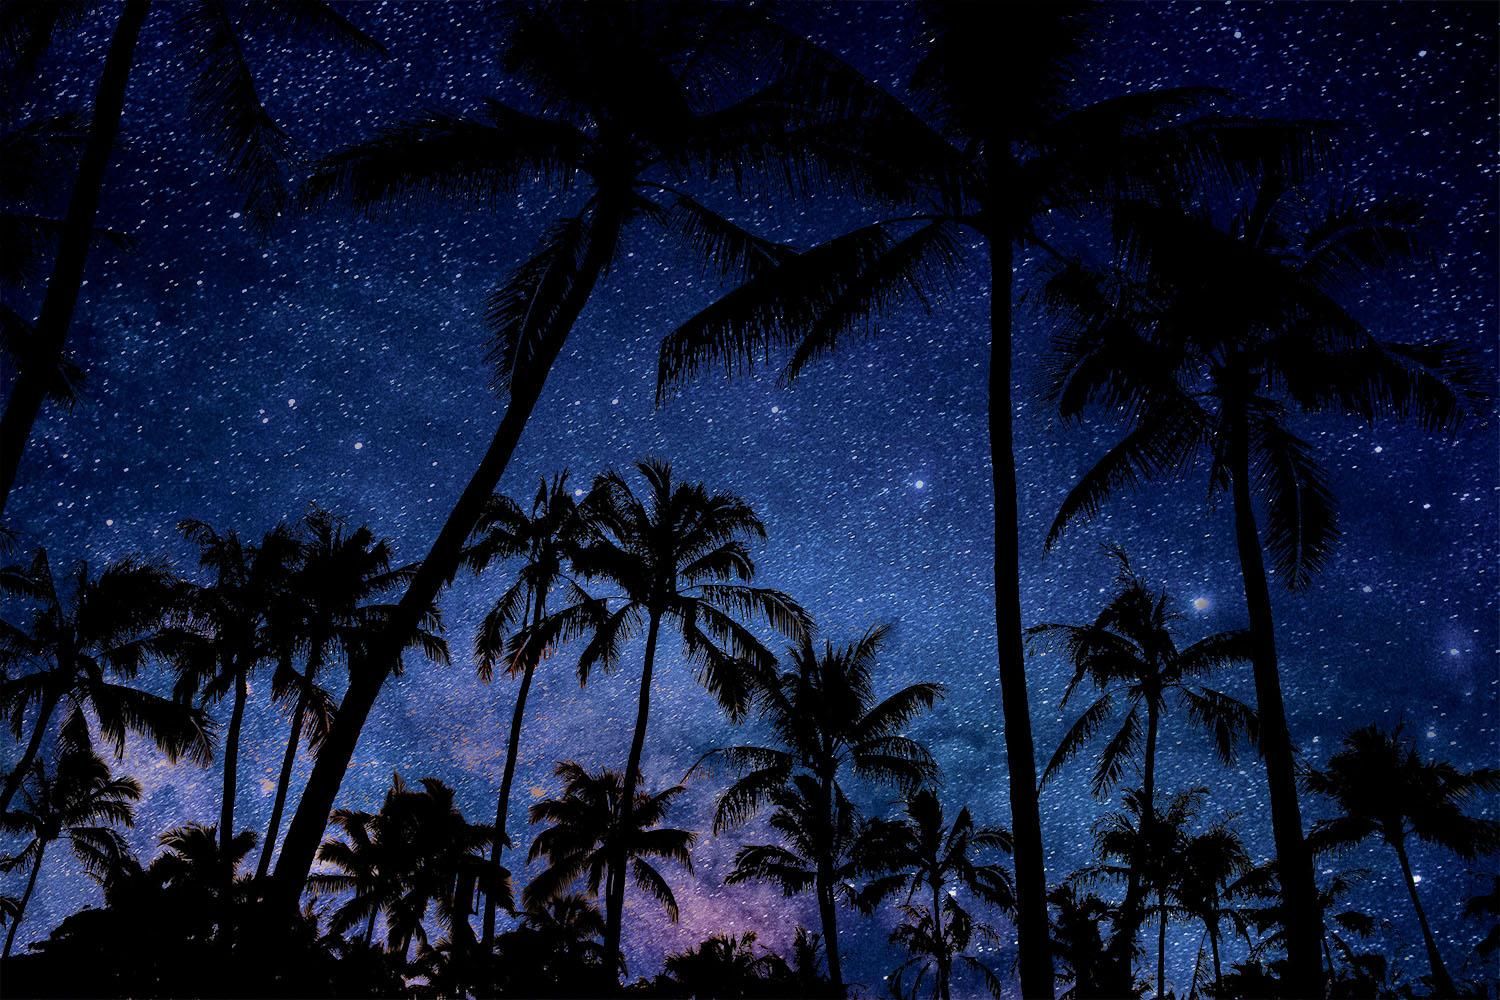
As you will see, the blown out sky is pretty well replaced by our background image. It is in no way a panacea and usually requires some additional masking, but certainly gets us to a properly composited image much faster than rotoscoping the entire foreground.
If you know what a luma key is, the Darker Color blend mode has essentially mimicked a luma key in this example, but with just one click. A chroma key (or green screen effect) would not work very well in this circumstance because they sky contains many colors.
When using Darker Color, check out its partner in crime, Lighter Color. It is the opposite of the Darker Color in that it displays the lighter pixels between the A and B image.

Using the same two images, the Lighter Color blend mode produced this image. It is certainly not the most practical use case, but demonstrates how, if shot properly, everyday objects can be used as masks in your post-production workflow.
Continue readingfor free
Unlock all 100,000 words of the Frame.io Workflow Guide and learn how the pros do workflow.
