Capture
Adobe Color Management
11 minute read
What is Color Management
Color management is a process for ensuring colors are consistent throughout your workflow. As media comes in from a variety of sources, different colors will appear in different ways on different equipment. It is actually quite difficult to get color to look the same, even when working inside of a single app ecosystem.
However, proper Color Management will keep everything looking as intended, even if you are using a mix of tools and color spaces in the same project. The various Adobe applications work with color in slightly different ways.
When planning for color management, the principle consideration will be what viewing environment your work is destined for, which will determine the color space. Most of the video delivery formats that produce these days for broadcast and web is still in the Rec. 709 color space. DCI-P3 is typically used in digital cinema, and Rec. 2020 is pretty much exclusively for emerging HDR formats and future proofing.
Getting consistent color across Adobe apps in a Rec. 709 video workflow
The following guide will help you set up a system for a successful Rec. 709 workflow, but you can apply this to workflows in other color spaces too. The various Adobe applications work with color in slightly different ways, but you can use these settings to match your color management plan to the color space your project needs.
Display profile in the OS – don’t mess with it, leave it at the default
Mac and Windows are color managed systems and use ICC profiles to ensure that colors are displayed correctly on the display. In general, you should never need to worry about it, just leave it at the default settings.
ICC Profile:In color management, an ICC profile is a set of data that characterizes a color input or output device, or a color space, according to standards promulgated by the International Color Consortium (ICC).
Checking that your OS display profile is set to the default
You should not need to change anything, but if something is looking weird, it’s a good idea to double check these settings.
MAC OS
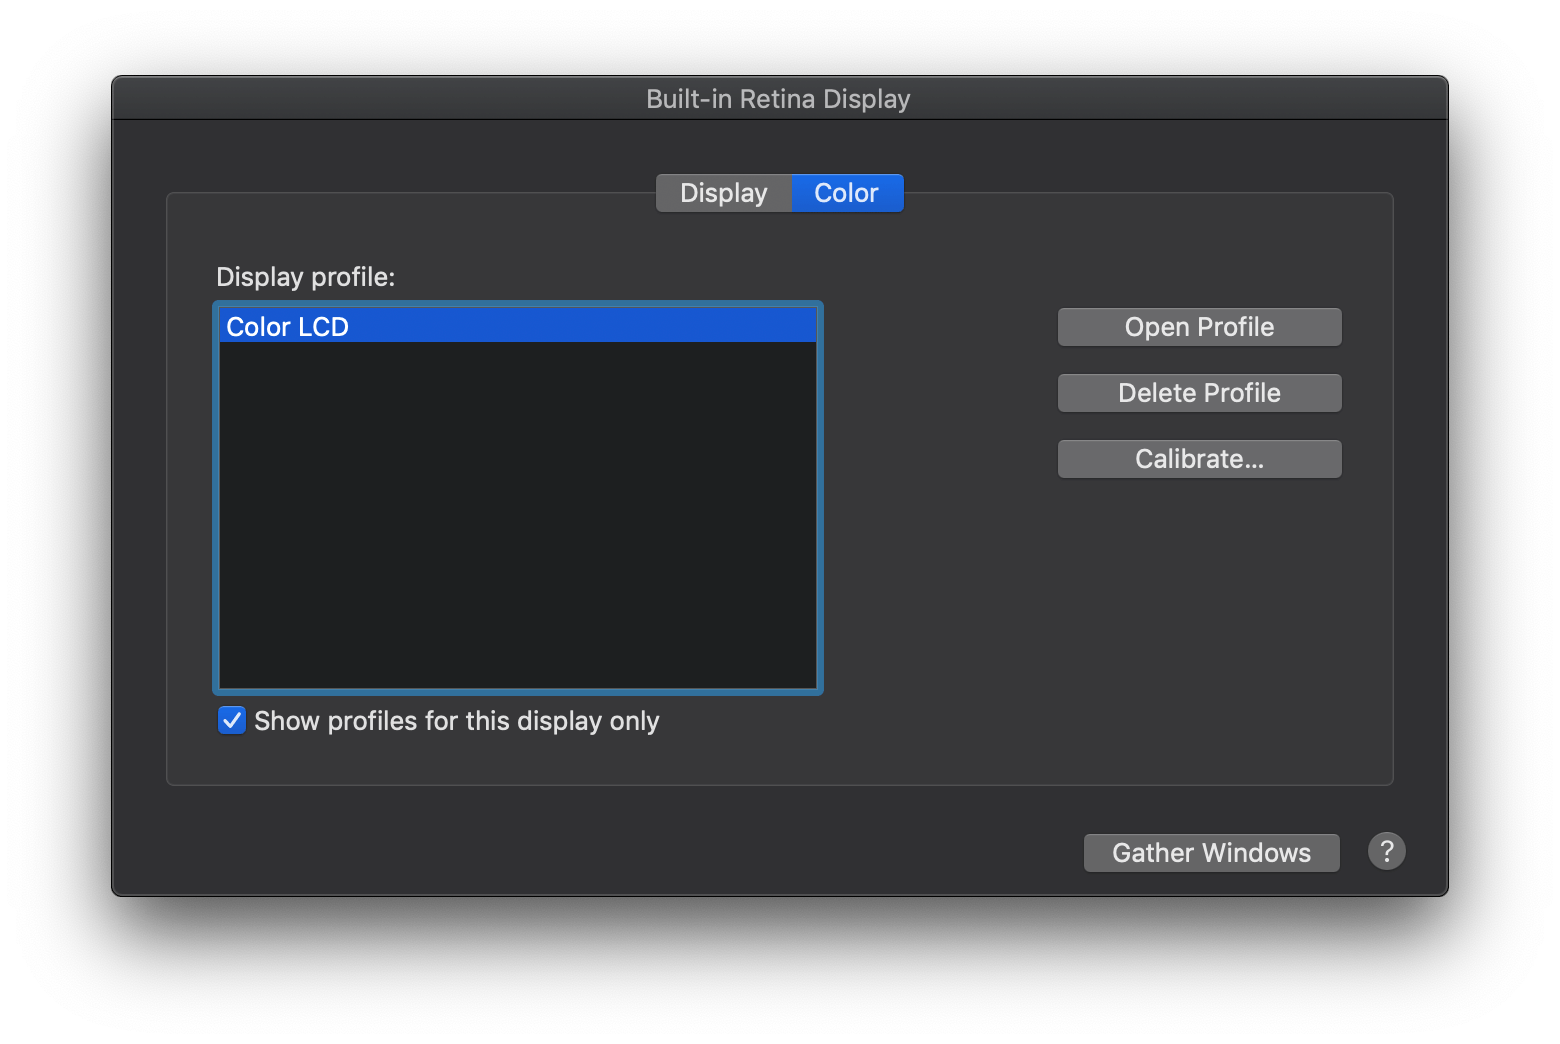
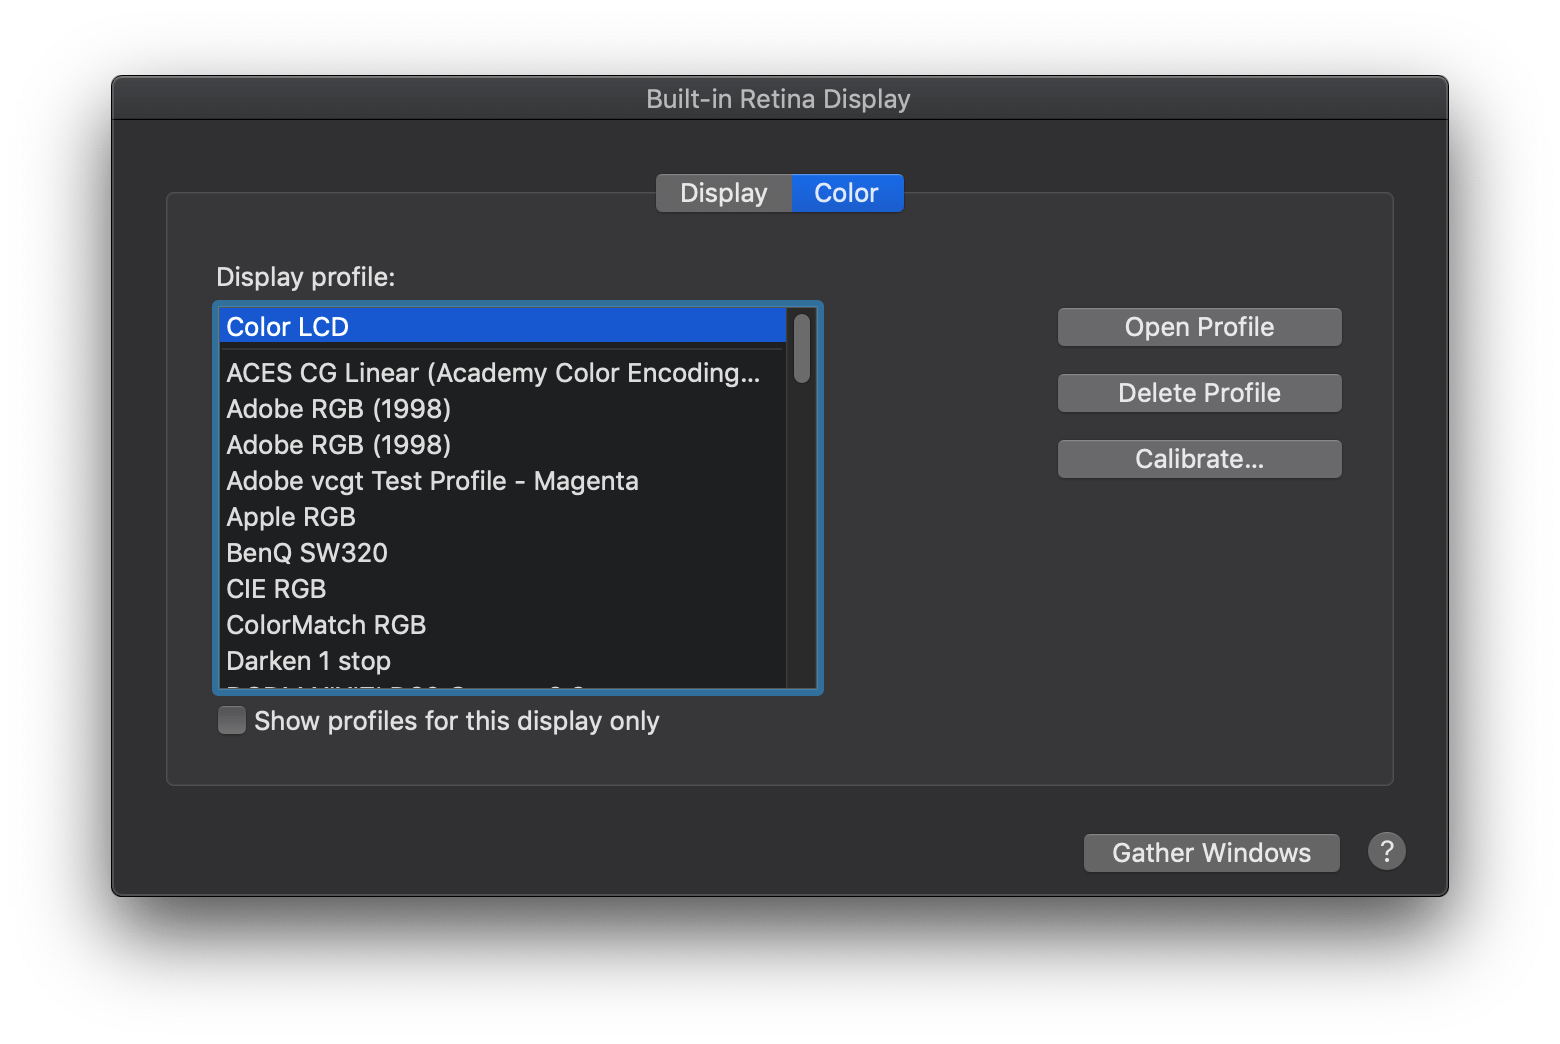
- 1Open System Preferences > Displays > Color
- 2Check the box “Show profiles for this display only” or choose a profile from the top of the list, above the line. These are designed for your specific display. In most cases you will only have one option.
Windows 10
- 1From Windows search – type “Change display settings” – open Display Settings panel.
- 2Choose the default profile from the “Color Profile” dropdown list. In most cases you will only have one option. The default is usually named after the model of your monitor. In the screenshot below, the monitor is a Dell P2715Q Monitor, so that is the correct choice.

Premiere Pro 13.0+ / Media Encoder 13.0+
What does Display Color Management Do? When Display Color Management is turned on, Premiere Pro reads the ICC profile selected in your operating system and does a conversion to display colors accurately on your monitor. This applies to the Premiere Pro Program and Source monitors, thumbnail previews in the Project panel, Media browser in Premiere Pro and Media Encoder, and export and encoding previews in Premiere Pro and Media Encoder. Display Color Management was introduced to Premiere Pro and Media Encoder in version 13.0 (CC 2018).
By default, display color management is disabled in Premiere Pro and Media Encoder. This is to prevent unexpected color shifts when upgrading from previous versions that do not have Display Color Management. It is recommended to turn this option on for all systems, however.
*Important Note: Display color management has no effect on exported colors, it only affects the colors that you see on your display.
How to Enable Display Color Management
Display Color Management requires GPU acceleration.
Premiere Pro
- 1Confirm that you have GPU acceleration enabled (File > Project Setting > General > Video Rendering and Playback)
- 2Enable Display Color Management (Preferences > General)
Media Encoder
- 1Enable GPU acceleration (Preferences > General > Video Rendering)
- 2Enable Display Color Management (Preferences > General)


After Effects
Color management in After Effects offers a few more options and works a bit differently from Premiere Pro. There are three distinct areas where you can select color space settings: Media Color Space, Working Color Space, Display Color Management.
Set your working space to Rec. 709
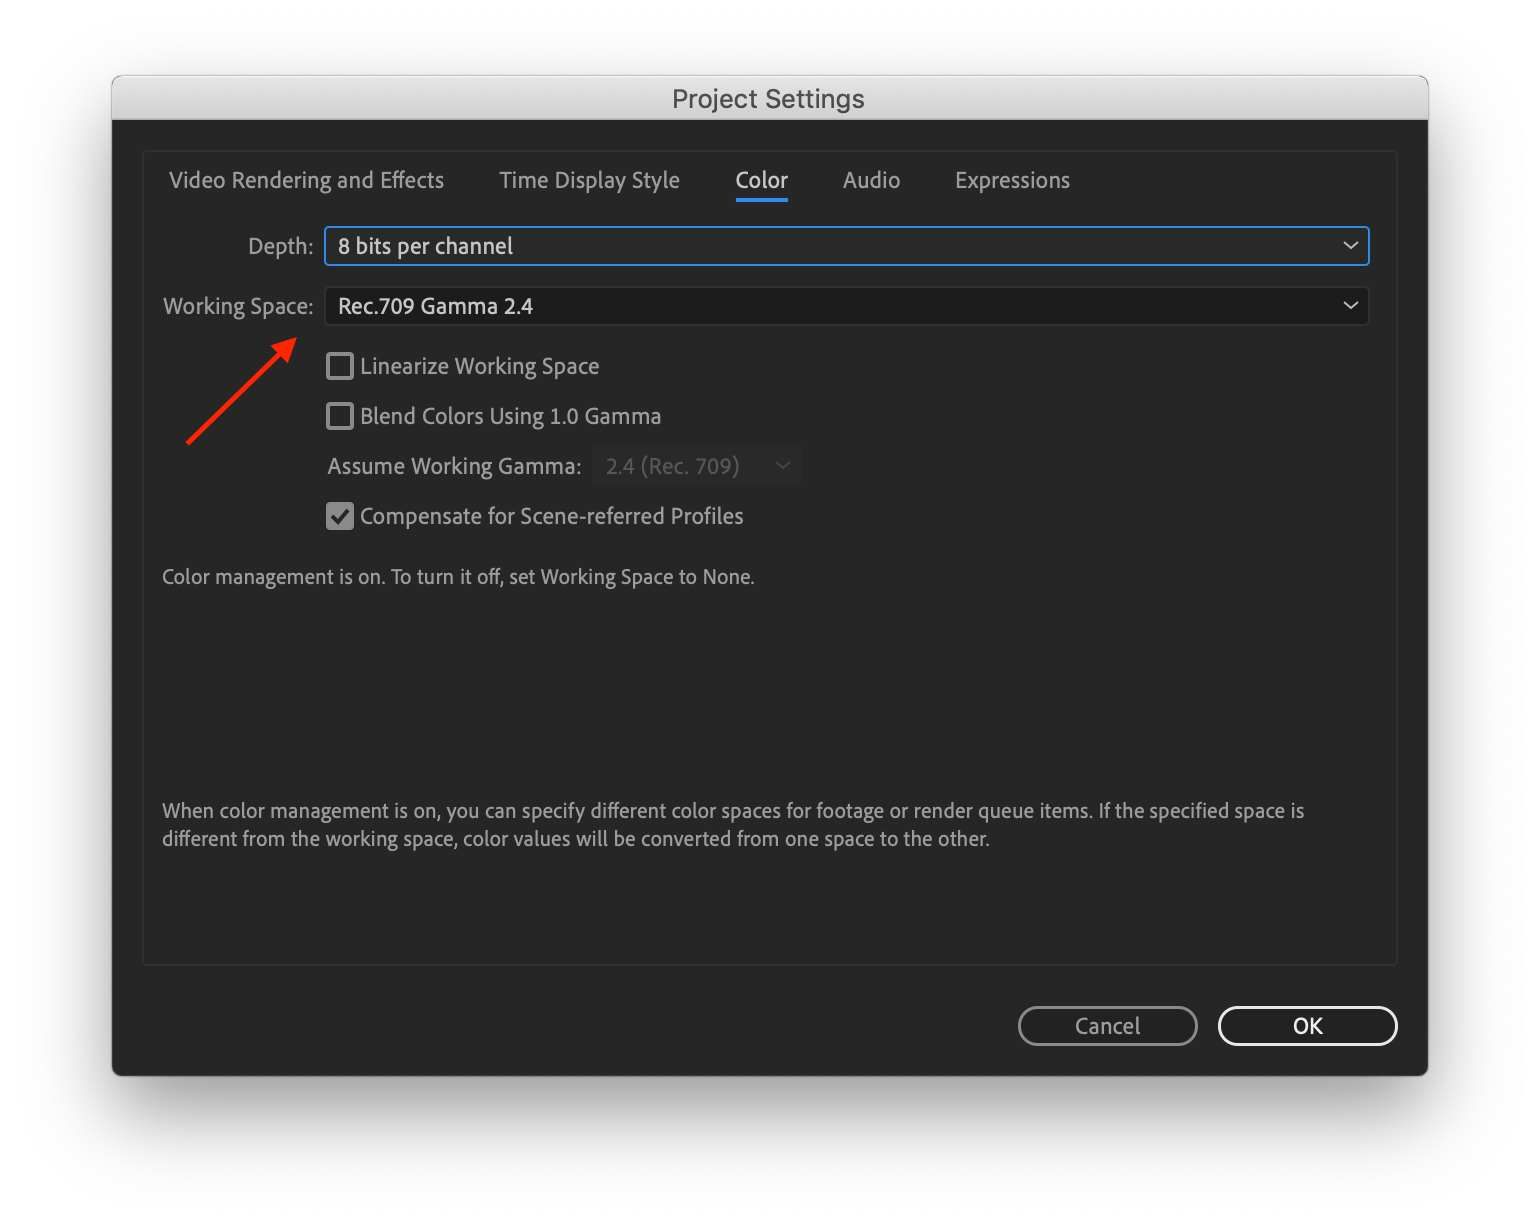
- 1Open the project settings color tab – File>Project Settings>Color
- 2Choose Rec. 709 Gamma 2.4 from the list
- 1Bring your current composition viewer into focus (click on it – it will have a thin blue outline)
- 2View Menu > Use Display Color Management
Media Color SpaceAfter Effects has the ability to work with media in various color spaces. You can see what the color space is and override it in cases where the metadata on the file is wrong or missing.
Check the Color space of your media
- 1First set your working color space to Rec. 709 using the instructions above
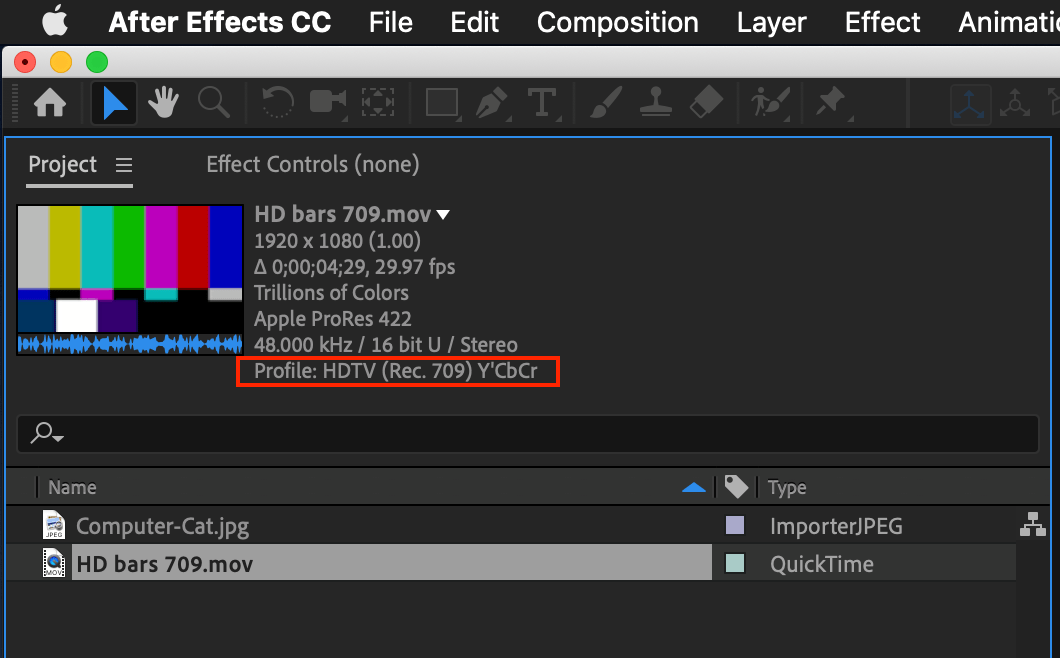
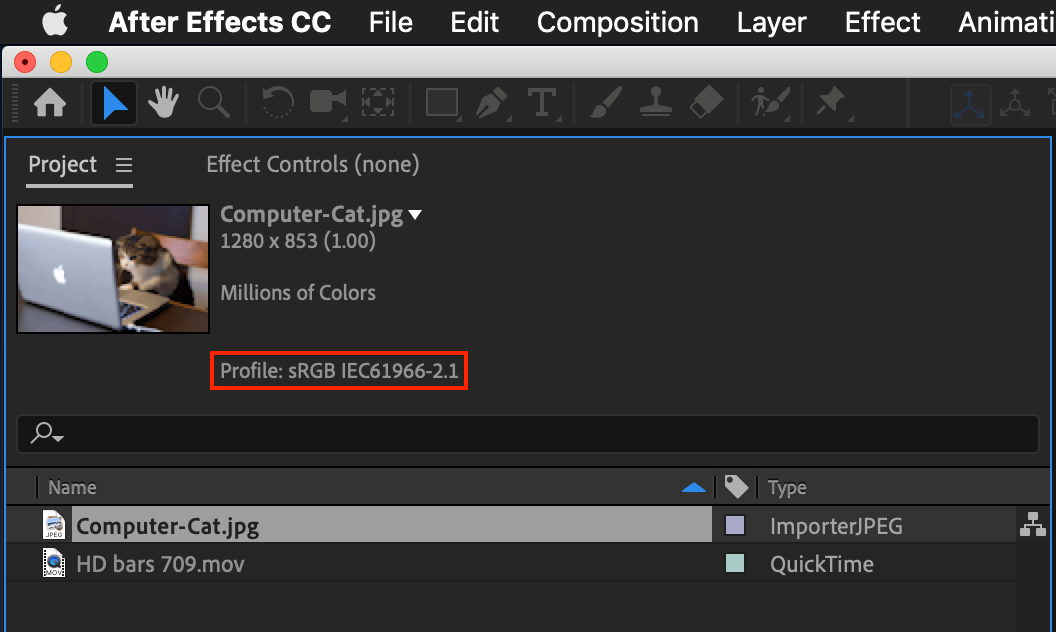
- 2Click on the file in your Project panel
- 3Inspect the media info that shows up at the top of the project panel
Override or set the color space of your media with “Interpret Footage”
Occasionally, you may come across a piece of media that is missing the color space metadata tag that is required to properly identify it – or the tag is wrong. If you are certain you know that it is wrong, you can correct this using “interpret footage”
- 1Right-click (control-click) on the media in the project panel
- 2Choose Interpret Footage > Main
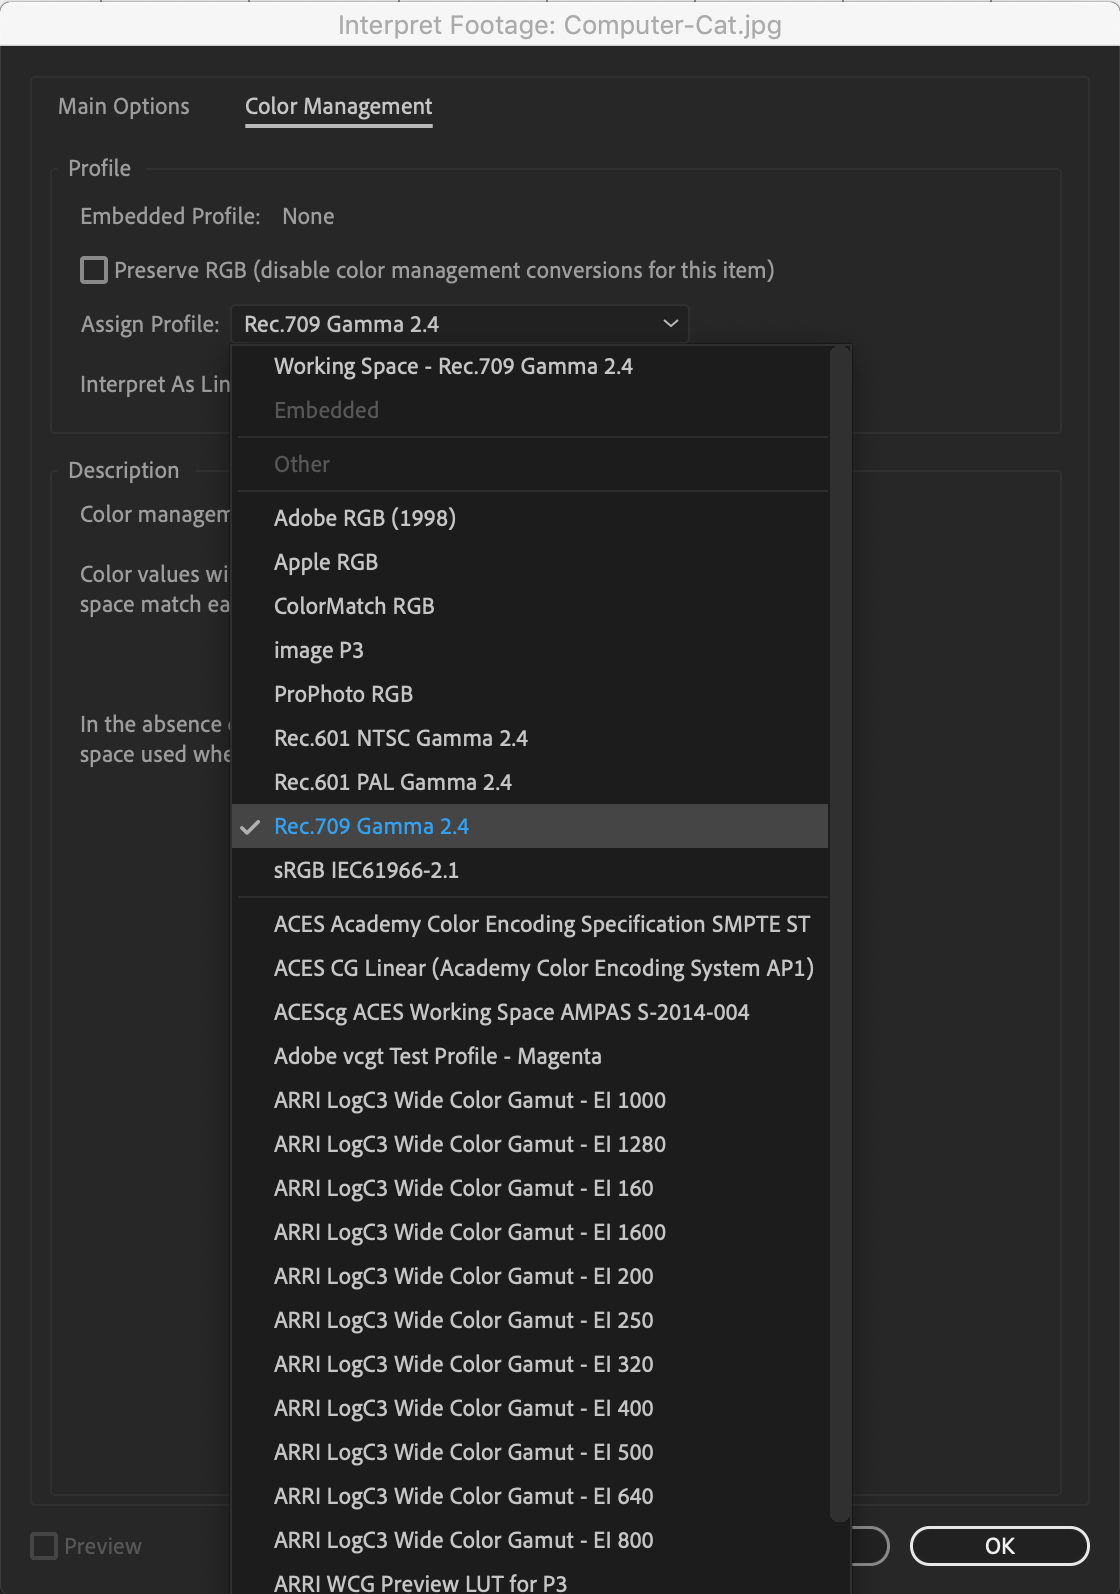
- 3The Interpret Footage window will open, click on the Color Management tab
- 4Open the Assign Profile dropdown menu
- 5Find Rec. 709 Gamma 2.4
Warning:Changing the assigned profile will change the appearance of color in the media everywhere it’s used in your project and will result in colors being rendered differently in your exports. Only do this if you really know that you need to.
One common reason to change the color profile is for graphics. Graphics which have been created in Rec. 709 often get interpreted as sRGB when brought in to After Effects and the colors look wrong. This can be fixed by manually interpreting the footage to Rec. 709 Gamma 2.4 Color Profile.
Photoshop
Color management is key for creating and displaying accurate colors in Photoshop. Color management is on by default and mostly operates behind the scenes, so you don’t have to worry about it.
Color management Settings in Photoshop
If your colors are misbehaving, check that these settings haven’t been disturbed. It’s advisable to leave these settings at the default.
Open the Color Settings Preference
- 1Launch Photoshop – a document does not need to be open
- 2Edit > Color Settings
- 3Ensure the Settings dropdown is set to the Default for your locale (North America,Europe, Japan). This will configure the following settings.


WAIT! sRGB! What? It is recommended to leave sRGB as the default and only setup documents intended for video use as Rec. 709.
What do these settings mean?
Working Space – RGB: This defines the default working color space for new RGB documents. sRGB is a good choice because photoshop is often used to create images for the web. The recommended setup for Photoshop is to leave it set to the default so that photos and images for the web will be correct by default and graphics for video are set up as Rec. 709 as a conscious change (so you know you got it right.) See the instructions below for assigning the Rec. 709 color profile when creating a new document. Of course, rules are made to be broken – if you only ever use photoshop for video work, you can set this to Rec. 709 and save a preset. This way Photoshop will always work in Rec. 709.
Working Space – CMYK. Gray. Spot: These are only for print work, so we don’t care about those in video; just leave them set to the default.
Color Management Policies: RGB: Preserve Embedded Profile – if there is an embedded profile, work in that space. So, if you create a document in Rec. 709, it will work in that space. See the instructions below for assigning the Rec. 709 color profile when creating a new document.
Assign the Rec. 709 Color profile when creating a new document
- 1File > New Document
- 2Choose a Film & Video preset like HDTV 1080p for example
- 3Open Advanced Options to reveal Color Profile
- 4Choose Rec. 709 Gamma 2.4 from the list
- 5Click Create

Choosing a file format to save in
There are some important considerations to be made when choosing a file format to save in.
- If you want a no-fuss color accurate format and you don’t need separate layers in Premiere or After Effects – choose TIFF – follow the instructions below to save in TIFF format
- If you need separate layers in Premiere and After Effects and you’re willing to do a little extra manual color management to get them – choose PSD – follow the instructions below for saving in PSD
- If you are going to hand off your graphics to someone else and need to make sure they can’t mess with anything – choose PNG or JPG – follow the instructions below for saving a version in PNG or JPG
Saving as TIFF, the recommended format for most graphics
TIFF is a highly recommended file format when working with graphics for video. It is widely supported, supports transparency, supports embedded color profiles, retains layers for flexible editing in Photoshop, but is conveniently flattened when brought into Premiere / After Effects.
- 1File > Save As
- 2Choose TIFF as format
- 3Enable Layers to retain editable layers in Photoshop
- 4Select “Embed Color Profile” – it should show Rec. 709 Gamma 2.4
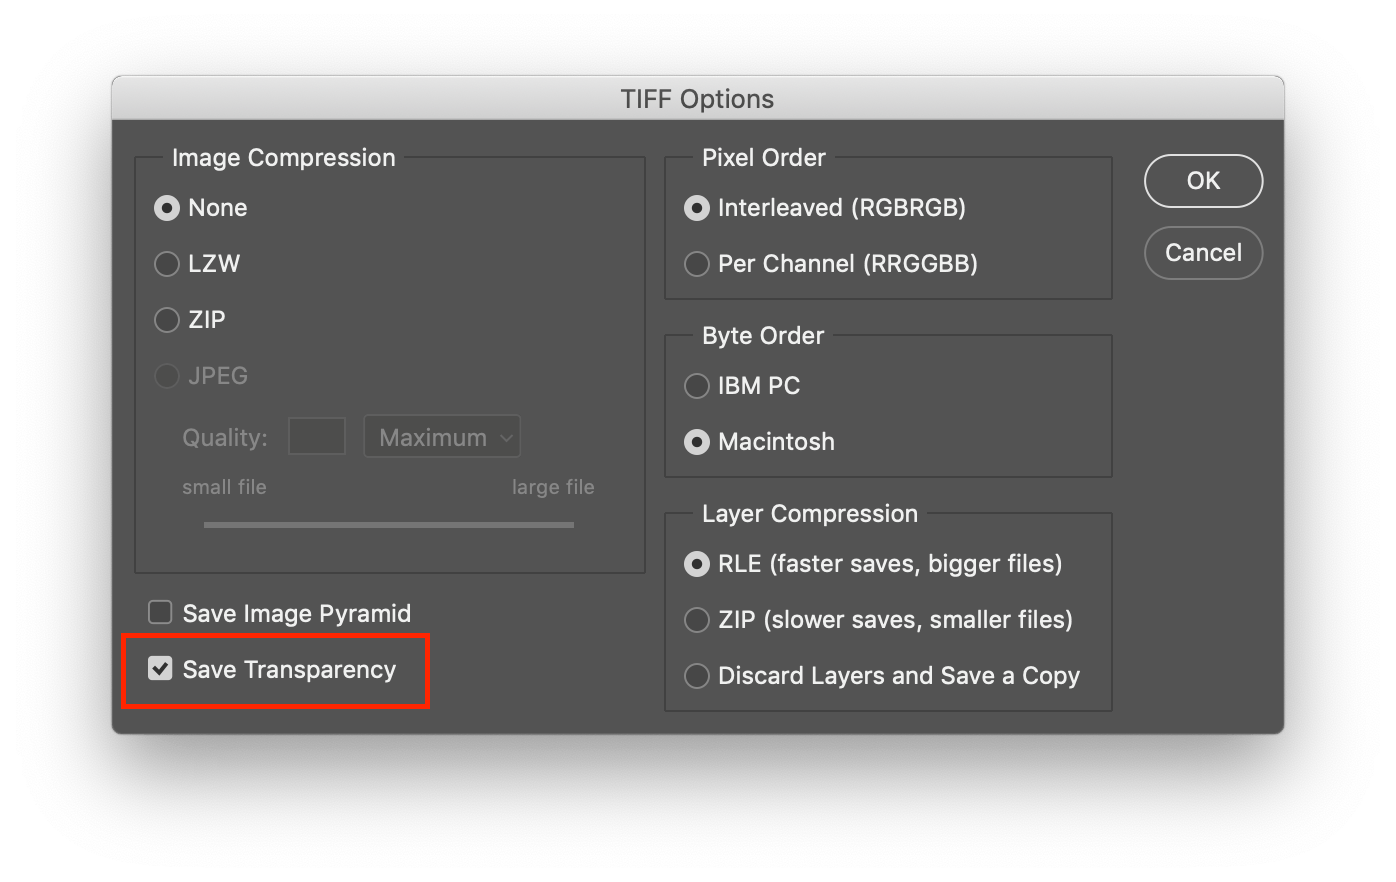
- 5After clicking Save, another dialog pops up – be sure to save your TIFF with transparency if necessary. This is especially useful for titles, lower thirds, network bugs and the like
- 6LZW compression can be used to reduce the file size if disk space is a concern
- 7ZIP compression is not compatible with Premiere Pro and therefore not recommended

Saving as PSD
The advantage of saving as a PSD is that it can be brought into Premiere Pro / After Effects as individual layers which can be useful for animation and motion graphics. A little extra care is required to maintain accurate colors between Photoshop and Premiere, however
Premiere Pro does not read color profile tags on PSD files
You can still get Premiere to display the correct colors, however, by saving your PSD file without a color profile embedded.
- 1Prepare your document in the same way as above, assign the Rec. 709 color profile at the start
- 2You will be working in Rec. 709 and seeing correct colors in Photoshop
- 3When saving, DO NOT save with an embedded profile
- 4Bring the file into PPro -> colors look correct
- 5Bring the file into AE -> Interpret footage to Rec. 709 -> colors look correct
- 6Each time you open the document again in Photoshop, follow the instructions below for assigning the Rec. 709 color profile to get colors to display accurately while working in Photoshop
- 7Each time you save, be sure to save without an embedded profile by choosing “Save as” and overwrite the original file being sure to uncheck the “Embed Color Profile” option

Saving as PNG or JPG
These are good options when you want to hand off final designs to another person and you want to make sure they can’t change anything.
- 1File > Export > Export As
- 2Choose JPG or PNG for File
- 3Disable “Convert to sRGB”
- 4Enable “Embed Color Profile”

Note: PNG supports transparency, JPG does not
What to do when colors look different between Photoshop and Premiere/After Effects
- Problem: The colors look correct in Photoshop, but wrong in Premiere?Solution: Convert the document to Rec. 709 in Photoshop using the instructions below. Save as TIFF with embedded profile or PSD without embedded profile.
- Problem: The colors look wrong in PhotoshopSolution: Assign different color profiles in Photoshop until you find the one that makes the document look correct. After you have assigned the one that makes it look correct, convert the document to Rec. 709. Save as TIFF with embedded profile or PSD without embedded profile. See the sections below on Assigning and Converting color profiles.
- Problem: The colors look correct in Photoshop, and Premiere, but not in After EffectsSolution: Use interpret footage dialog in After effects to change the color profile to Rec. 709. See the section on After Effects below
Assign a color profile to an existing document
Do this when the colors in Photoshop look wrong because the profile is wrong or missing.
- 1Open the document in question
- 2Take a good hard look at the colors in the image? Do the colors look wrong?]
- 3If the Colors look wrong, then proceed with assigning the document color profile
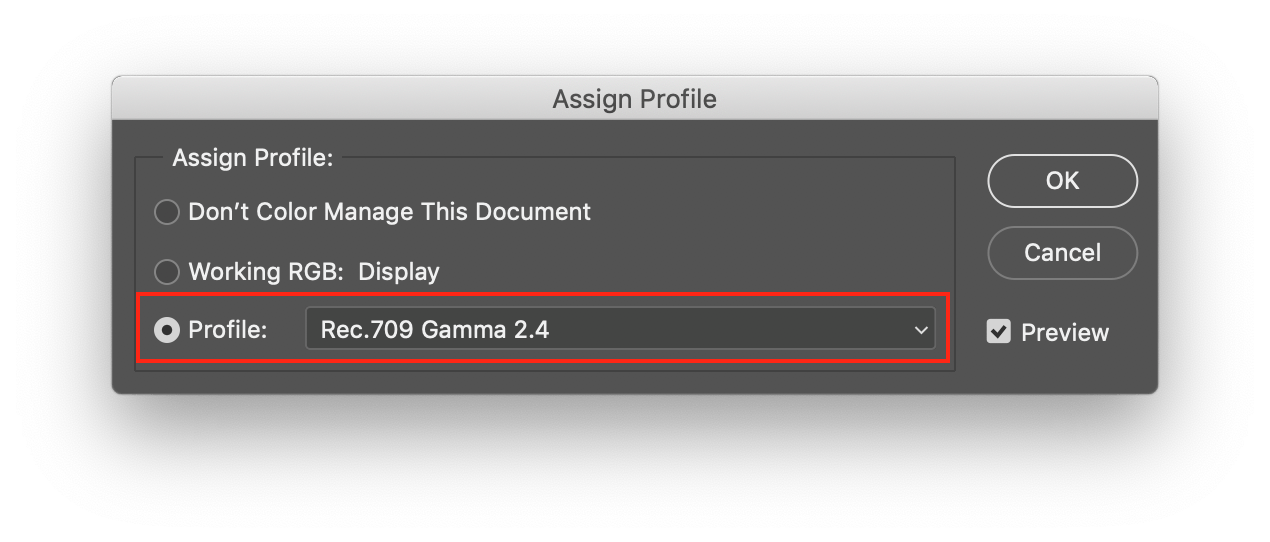
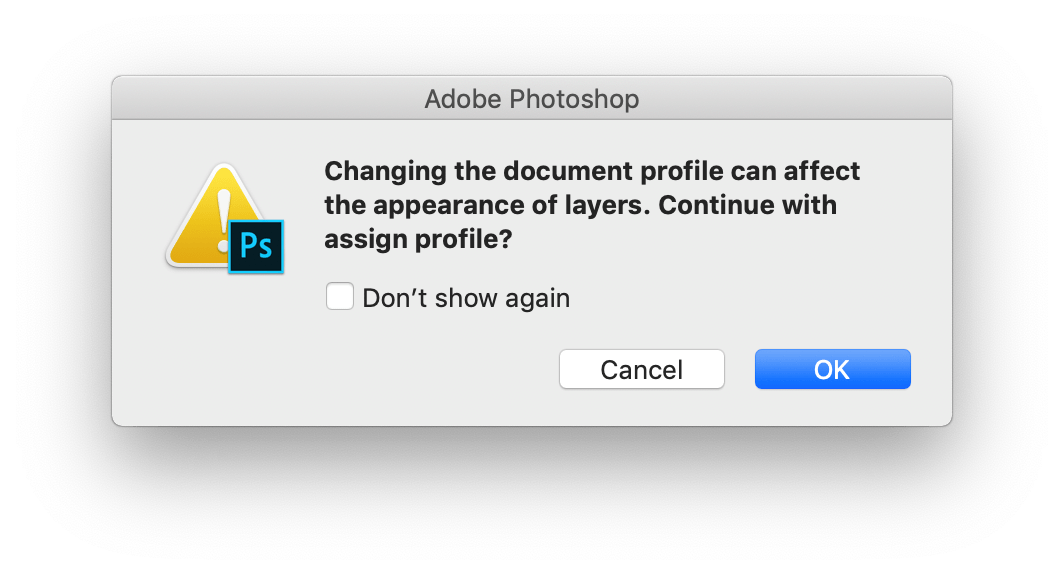
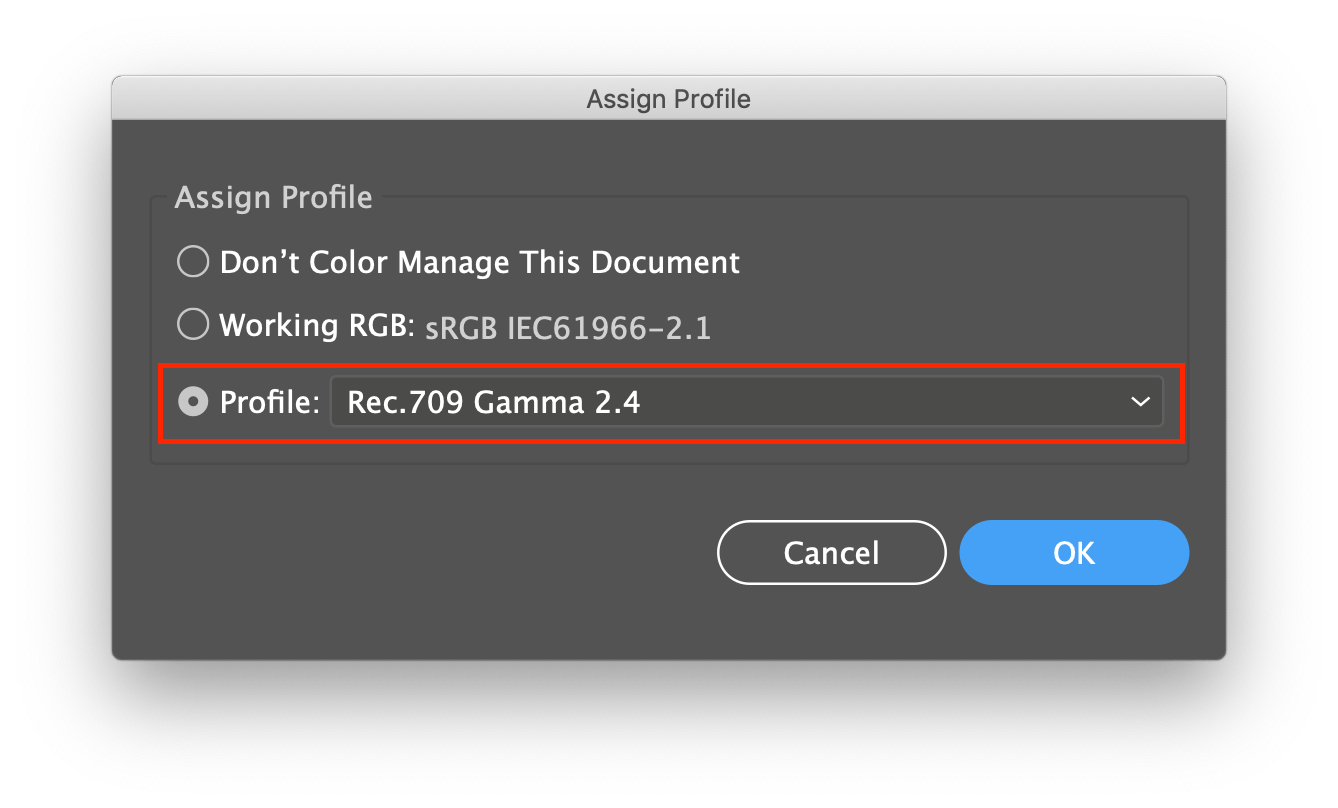
- 4Edit > Assign Profile – the Assign Profile dialog pops up
- 5Choose Profile: Rec. 709 Gamma 2.4
- 6Notice the Preview check box – you will see a change in the image. Hopefully it looks correct now
- 7Click OK
- 8The colors are not converted, rather the file is assigned a new profile which will change how the colors are interpreted and therefore the way it looks.
- 9If the file still looks wrong even after you have assigned the Rec. 709 Color Profile, try assigning different profiles until you find one that makes the colors look correct. If Adobe RGB, for example, makes the colors look correct, assign it. Then follow the instructions below for converting to Rec. 709.
Convert the color profile of an existing document
Do this when the colors in Photoshop look correct but the profile is wrong or missing.
- 1Open the document in question in Photoshop
- 2Take a good hard look at the colors in the image? Do the colors look correct?
- 3If the colors look correct, then proceed with converting the document color
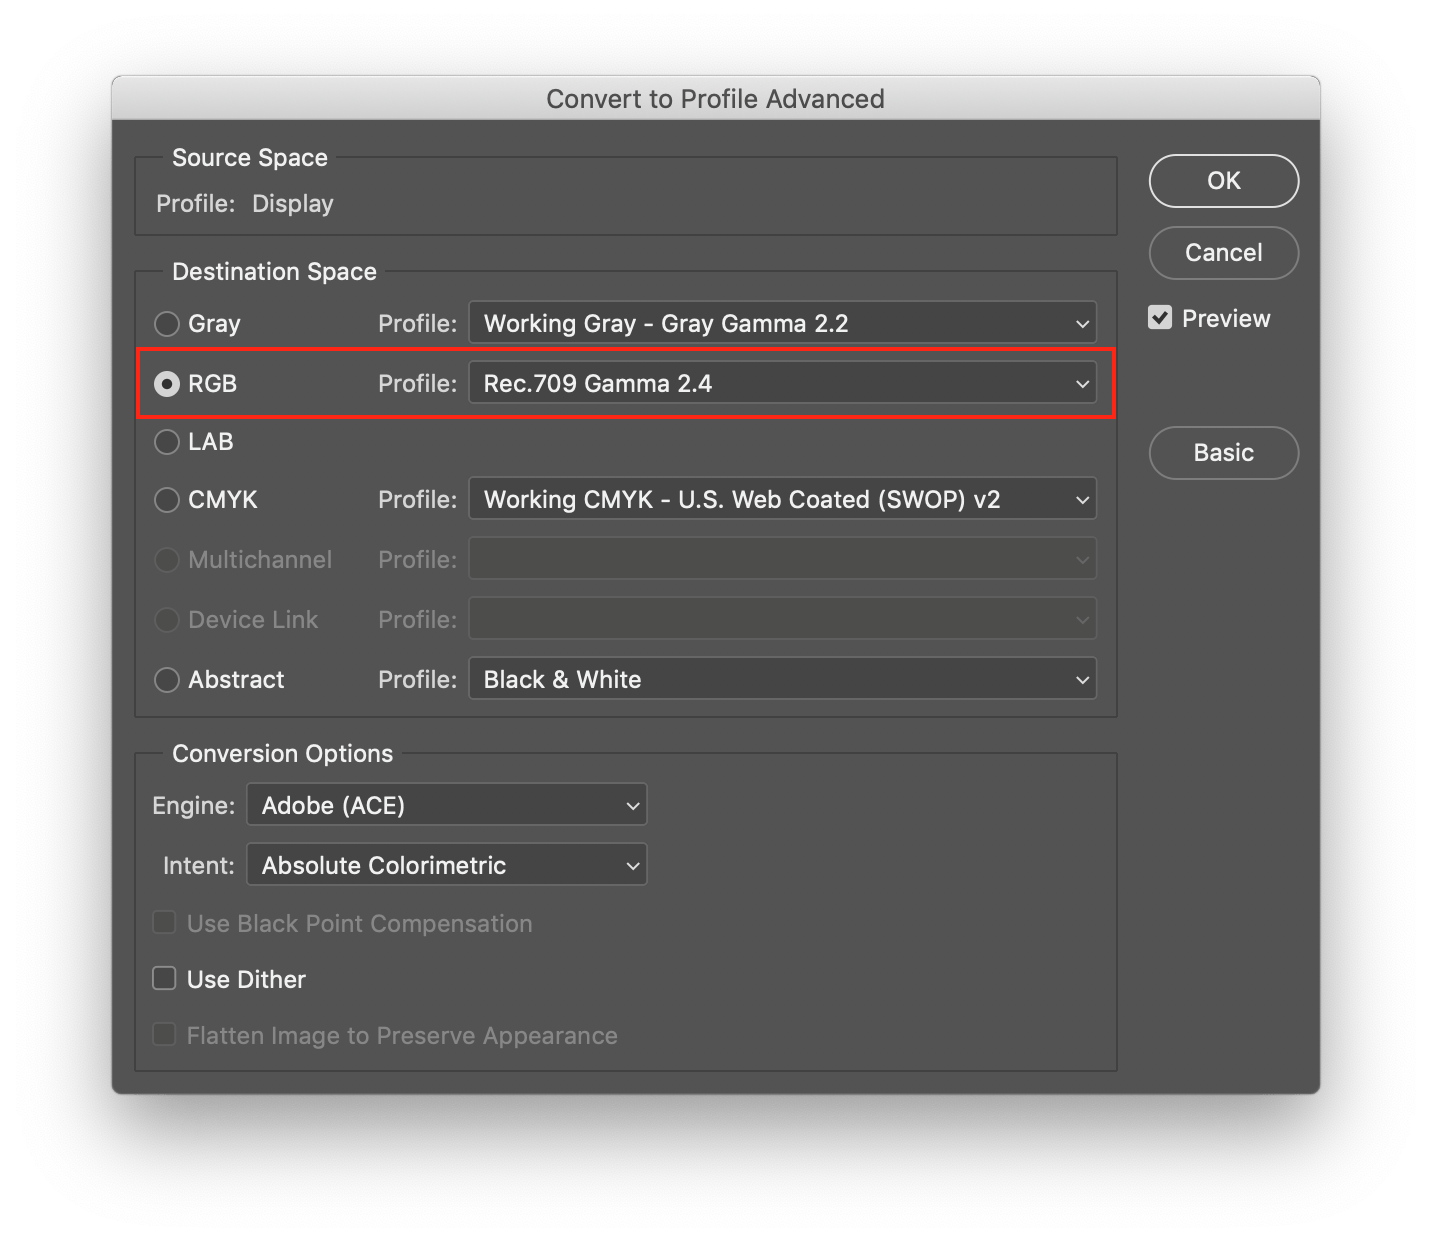
- 4Edit > Convert to Profile – the Convert to Profile dialog pops up
- 5Choose RGB Profile: Rec. 709 Gamma 2.4
- 6Notice the Preview check box – you should see no change in the image. This is what you want to see.
- 7Click OK
- 8The colors are converted from the old space to Rec. 709 so that they look perceptually the same.
Illustrator
Illustrator is a great option for creating vector graphics that can be infinitely scaled in AE using the “continuous rasterize” option (not possible in Premiere Pro). The embedded color profile will not be read in Premiere or After Effects, but you can still get accurate colors.
Creating an Illustrator document that will look the same in Illustrator and Premiere Pro / After Effects
- 1File > New
- 2Choose one of the Film & Video presets, HDTV 1080 for example
- 3Under the Advanced Options, ensure Color Mode is set to RGB Color
- 4Click Create – the new document opens

- 1Edit Menu > Assign Color Profile > Rec. 709 Gamma 2.4
- 1Design your graphic and make the colors look the way you want
- 2Save – DO NOT embed the ICC profile
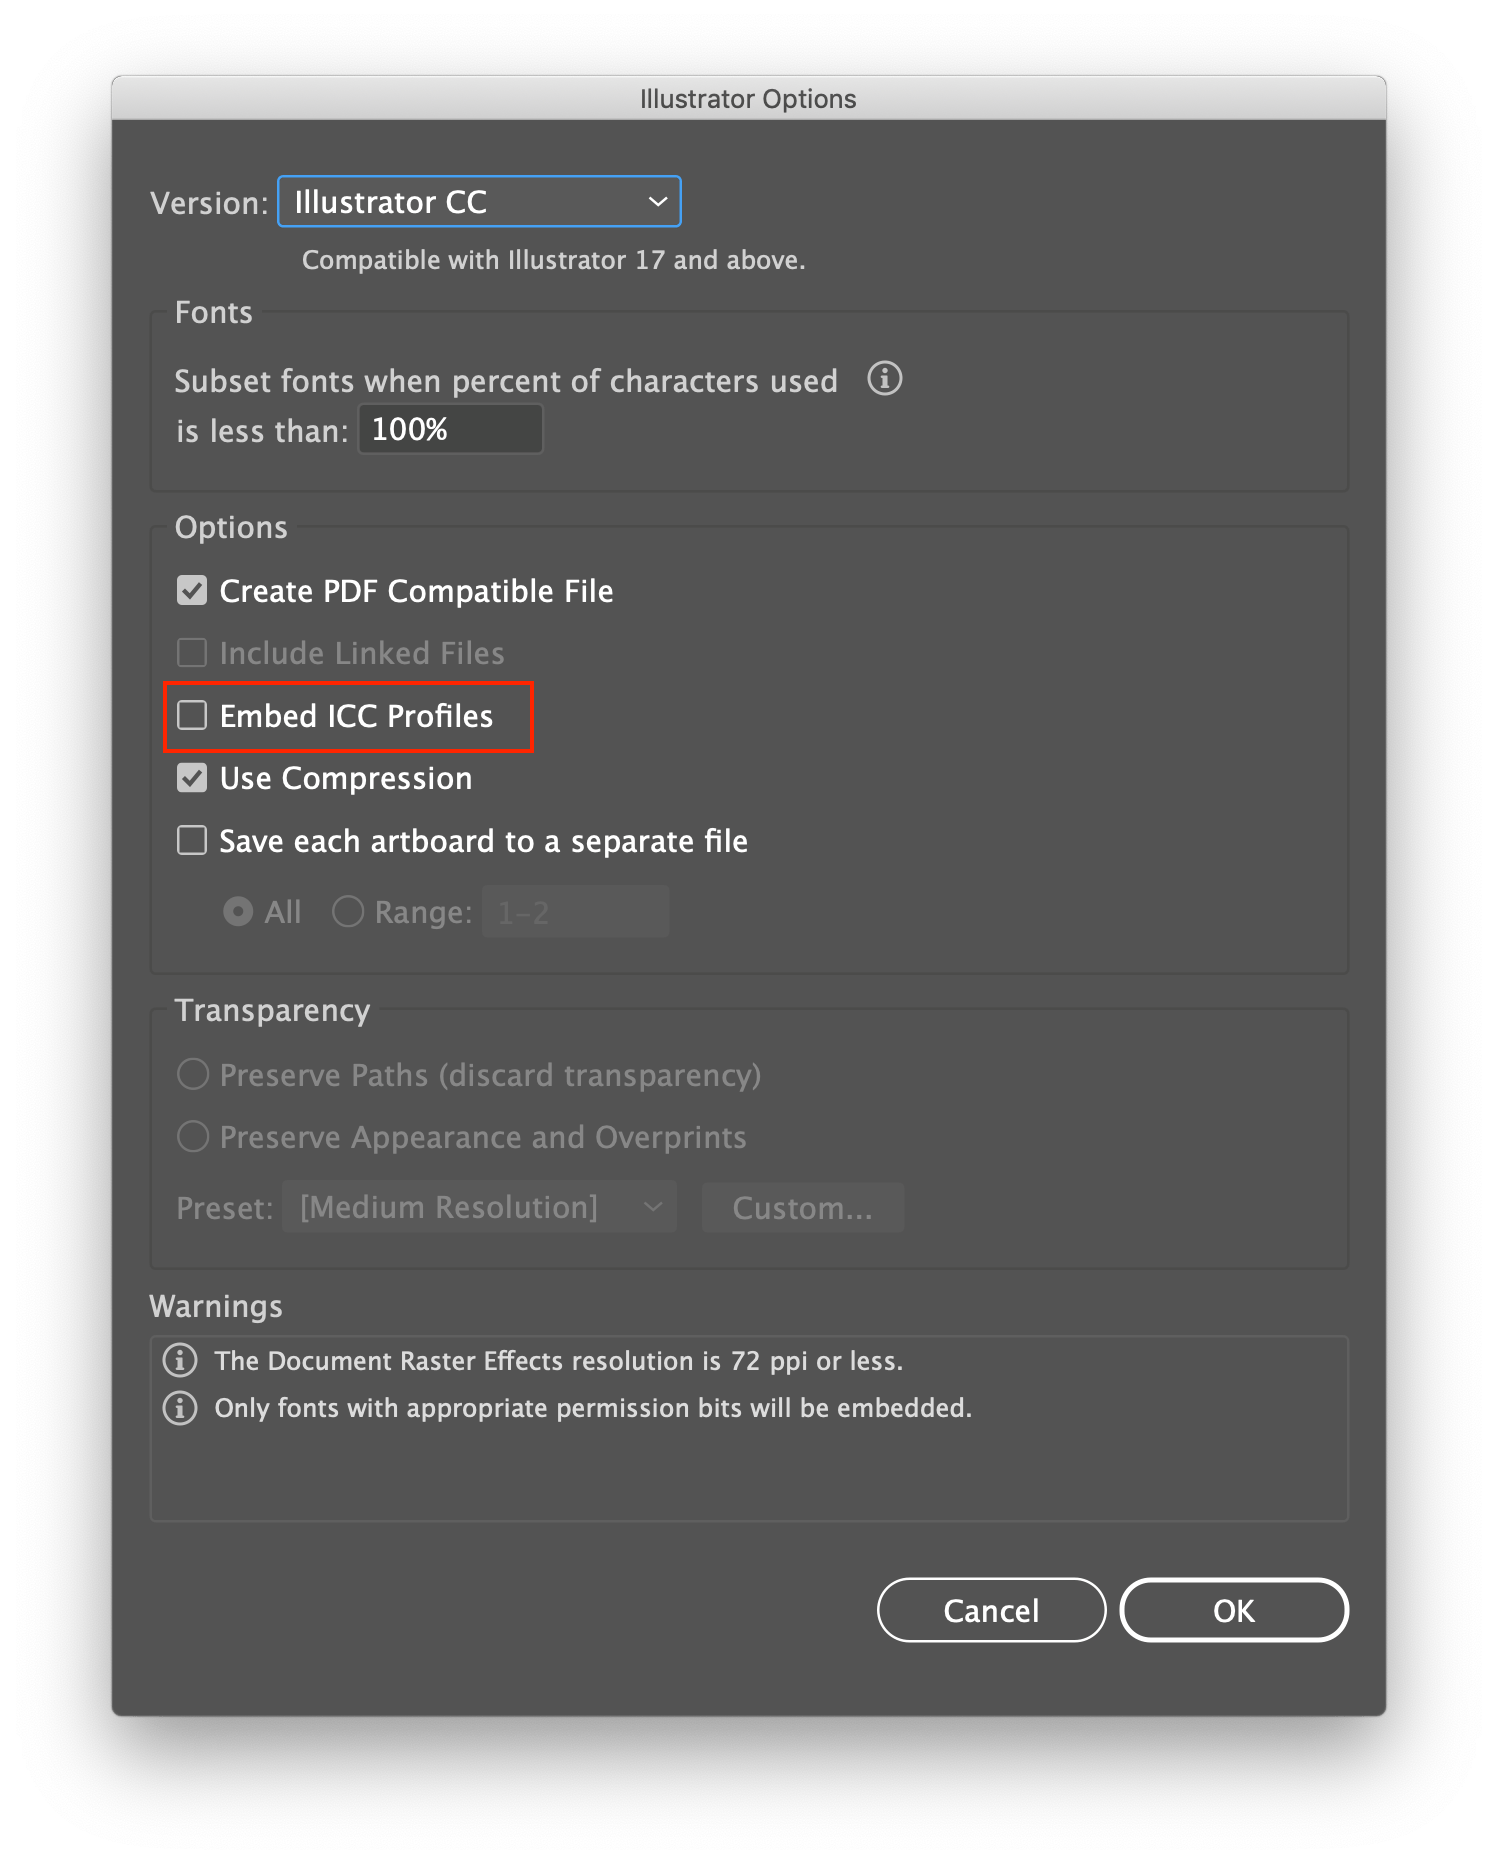
- 1Open in PPro -> Colors look correct
- 2Open in AE -> Interpret footage to Rec. 709 – Colors look correct
- 3Collect Emmy/Academy Award
Continue readingfor free
Unlock all 100,000 words of the Frame.io Workflow Guide and learn how the pros do workflow.
